Manage Approval Types
The Omni Approval module provides a centralized and efficient framework to execute and control all approval workflows.
Covers all business approval scenariors.
Enables approvals by any authorized user.
In Viindoo, Approval types define how an approval process is configured: who is involved, who recevies notifications, and what transaction will be generated after approval.
Requirements
This tutorial requires the installation of the following applications/modules:
You can find all default approval types when navigate to Approval > Configuration > Approval types. To create a new one, press New button.
Note
You need to have the Administrator access right of Approval app in Viindoo in order to create approval types.

And then, fill in the needed information:
General configurations
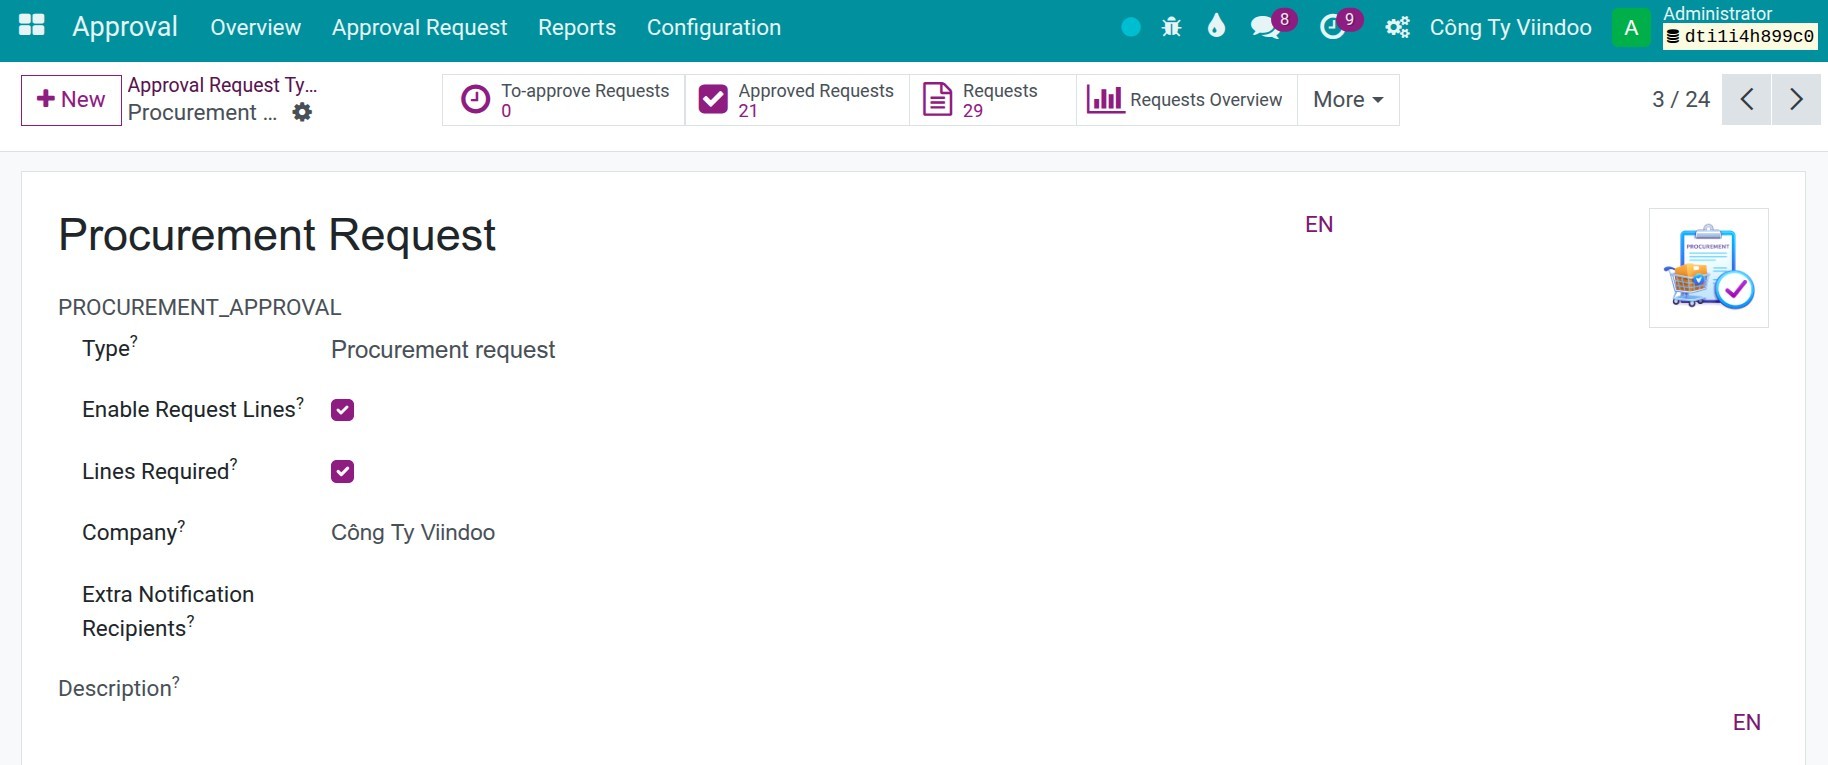
Type the Approval Type’s name.
Type: The following approval types are supported:
Generic
Estimate
Quotation/Sale Order
Customer Invoice
Outbound Payment
Stock Transfer
Inventory Reallocation
Bill of Material
Production Order
Procurement Request
Project
Project Task
Timesheets
HR Applicants
Recruitment
Employee Contract
Coaching
Enable Request Lines: Enable this option to add approval lines to the request, allowing you to define the list of products or other items included in the request.
Lines Required: Enable this option to required users to fulfill information to the approval lines.
Extra Notification Recipients: Additionall users who will recieve approval notifications besides the main approvers.
Description: Add more details of this approval type to clarify for users.
Approval Process
The Approval process tab allows you to define the approval paticipants and the conditions that trigger their involvement:
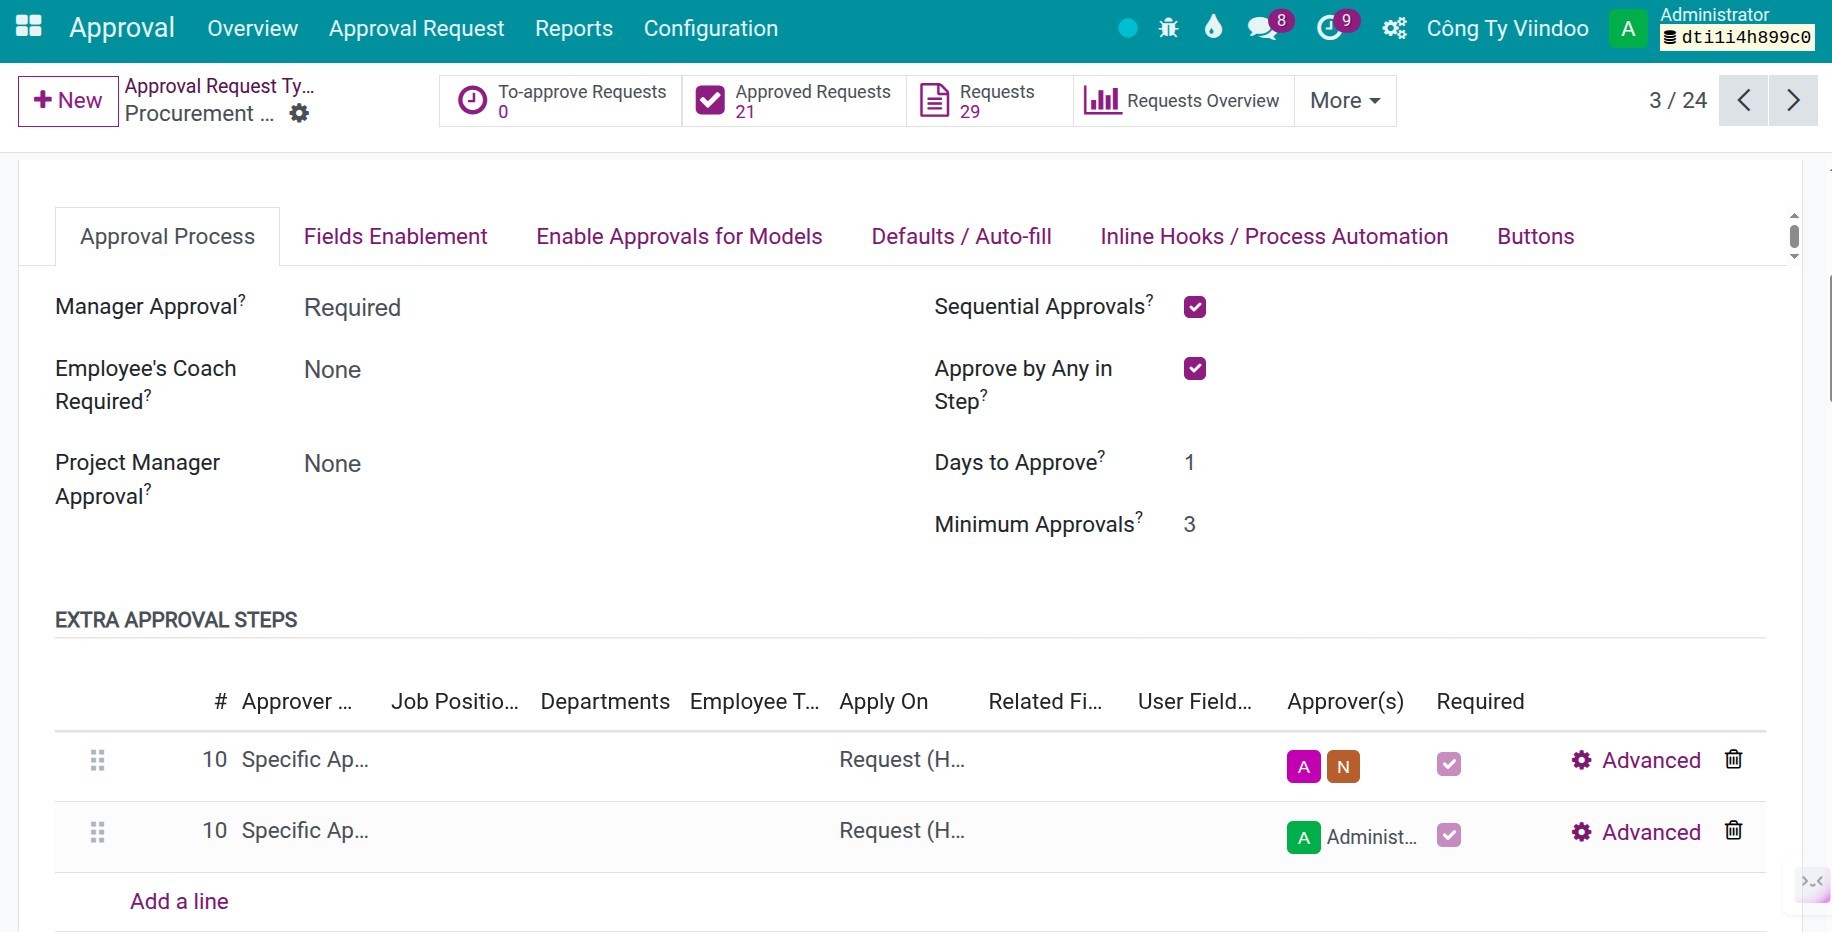
Manager Approval: Define how the manager paticipates in the approval requests of this type. To be eligible as an approver, the manager must have at least the Approval: Team Approver access right and be assigned as the direct manager of the employee. You can choose one of three options below:
None: The managers won’t join the approval process.
Optional: The manager will be one of the approvers but won’t be a required one. The request can still be approved if it reaches the minimum approvals and all the required approvers are approved.
Required: The employee’s manager is one of the required approvers. That means if the manager doesn’t approve the request, it will be refused.
Employee’s Coach Required: Define how the employee’s Coach paticipates in approval requests of this type. To be eligible as an approver, the employee’s coach must have at least the Approval: Team Approver access right and be assigned as the coach of the employee. There are also three options as Manager Approval that you can choose: None, Optional and Required.
Project Manager Approval: Define how the Project Manager paticipates in approval requests of this type. To be eligible as an approver, the Project Manager must have at least the Approval: Team Approver access right and be assigned as the project manager of the project. There are also three options as Manager Approval that you can choose: None, Optional and Required.
Warning
If all three roles of Manager, Coach and Project Manager are enabled, the approval order will be Project Manager, then Coach, then Manager and then the extra approvers.
Sequential Approvals:
If selected, the approval request will be processed sequentially, step by step, following approver list. Each approver will receive a notification and see the Approve button only after the previous step completed.
If not selected, all approvers will recived a notification at the same time. They can approve the request while it is still in progress. The request is completed once all approvers in the list have approved it.
Approved by Any in Step: When enabled, each approval step can have multiple approvers. Only one of them needs to approve for the step to be completed.
Days to Approve: The number of days allowed for approvers to review the requests of this type. This value is used to calculate the deadline of the Schedule Activity that assigned to each approver.
Minimum Approvals: The minimum number of approvals required for requests of this type.
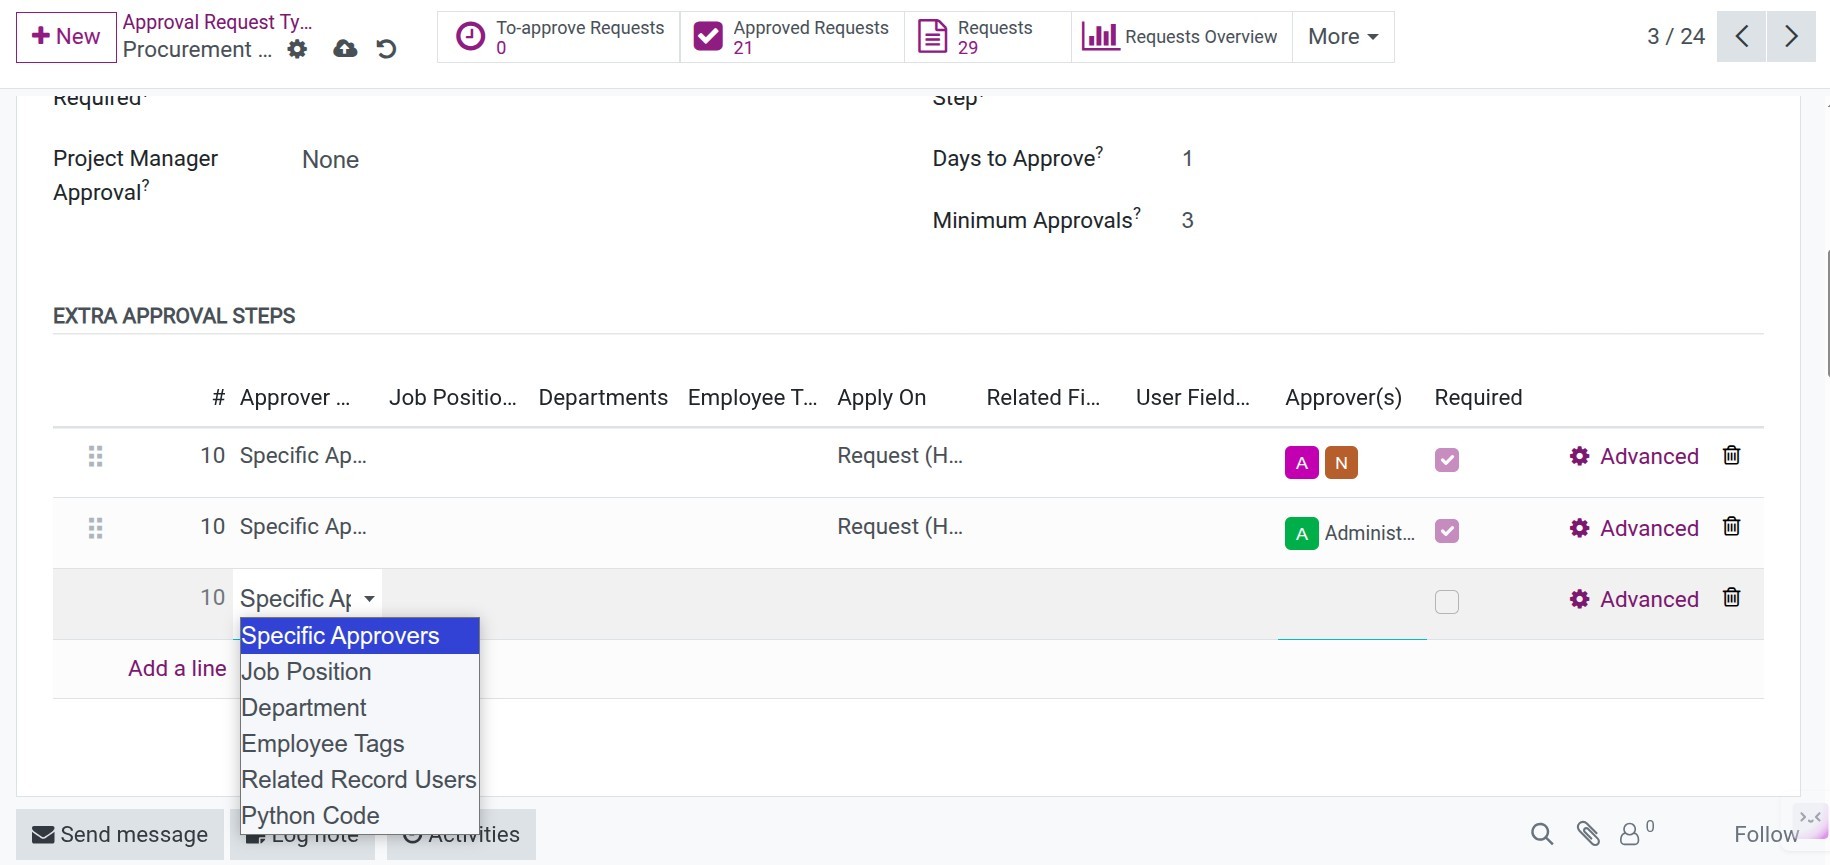
Extra approval steps: Define extra and flexible approver will paticipate in the approval process. There are total six selectors that you can use to define more approvers:
![Approval selector]()
Specific Approvers: This selector allows you to choose one ore more user at Approver(s) field.
Job Position: This selector allows you to choose approvers based on job position. Approver are resolved from active employees whose has job position matches one of the selected jobs. If Employee Tags are set, only employees having at least one of those tags are included.
Department: This selector allows you to choose approvers based on department. The system starts from the selected department and picks its manager if eligible. If the department has no manager, or the manager is not eligile, the system searches upward in the parent department chain untill it finds the closest eligible manager. If Employee Tags is set, the manager must also match at least one of those tags.
Employee Tags: This selector allows you to choose approvers based on the employee tags. It provides more flexibility when approvers are not tied to the formal organization hierarchy.
Related Record Users: This selector allows you to choose approvers based on the related records such as the responsible user of products or warehouses, etc.
Related record can be Apply on the Request (Head) or on the Request lines.
Related Field: This field lets you pick the field that link request (or request lines) with the related document you want to use for finding approvers. If no related document is found, this approval step will be skipped, even if it is marked as required.
User field on related record: This field let you choose the user field on the related document that should act as the approver. If no eligible user is found, this approval step will be skipped, even if it is marked as required.
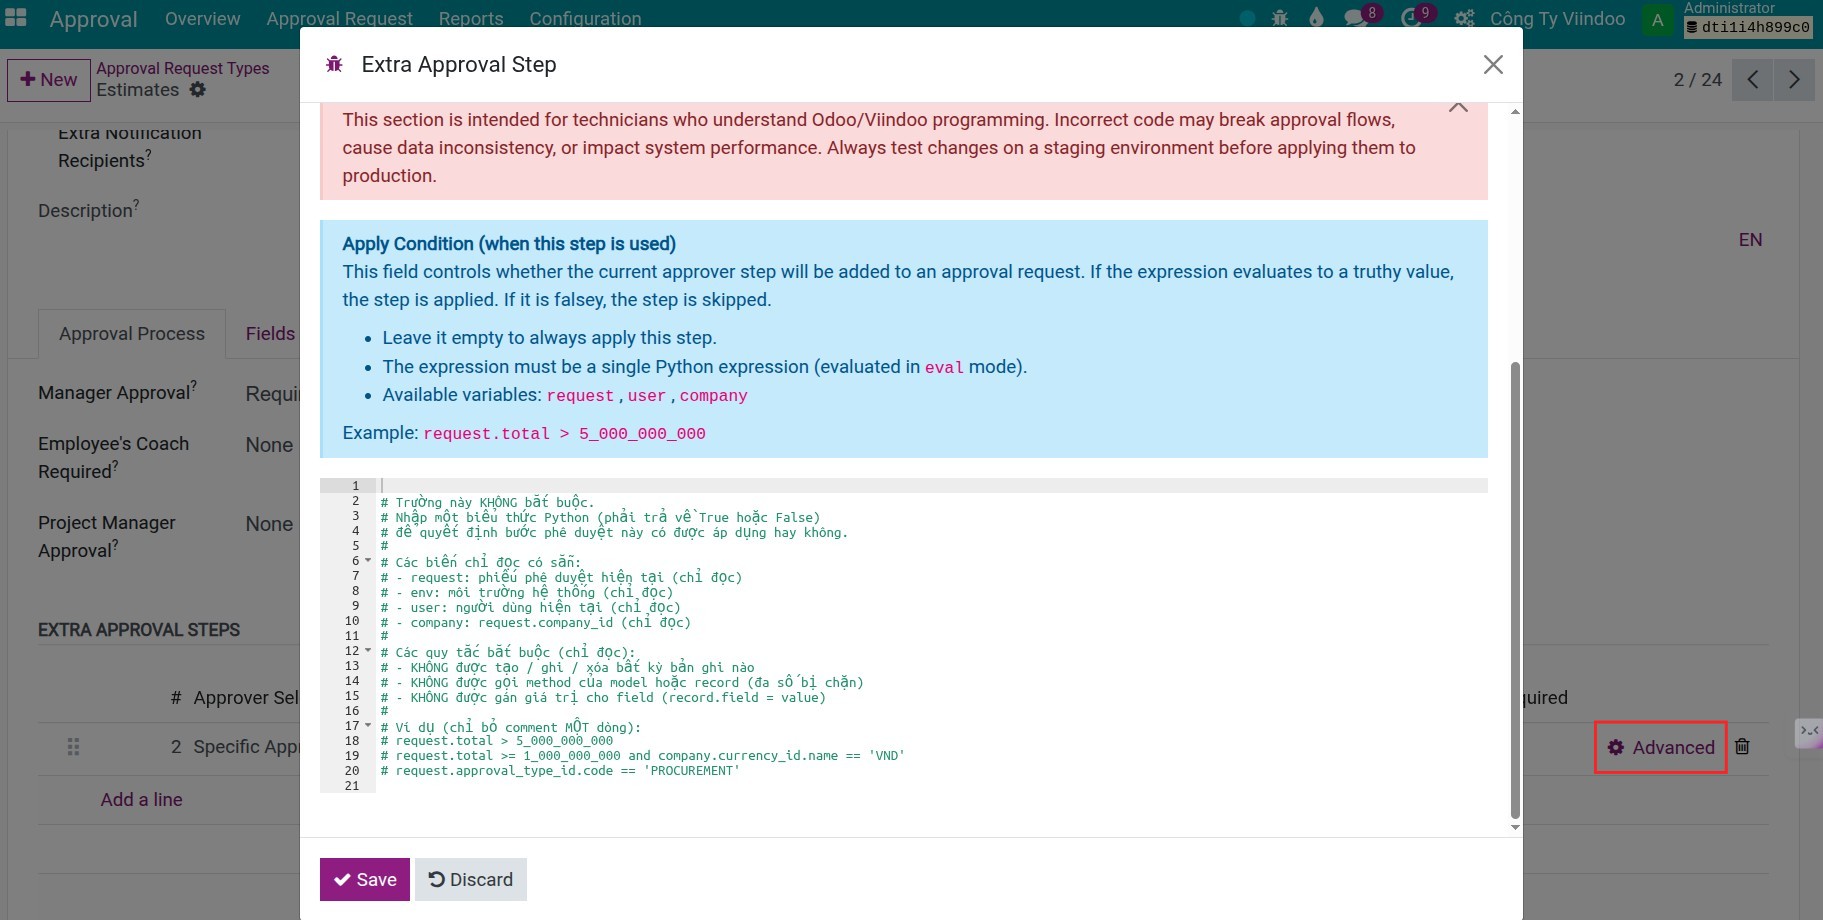
Python Code: This selector allows you to choose approvers using Python code. It is the most flexible option, but it requires familiarity with Python programming and a deep understanding of the system struture. This feature is recommended for developers or professional users only.
After selecting this option, save this approval type first.
Then go back to the Advanced button and enter the python code there.
Another feature allows you to restrict approval steps based n an amount condition by defining Python code. For example, approvals over 50 millions VND may require CEO approval.
After choosing one of those selectors, click the Advanced button
Enter to Python code condition, for example: request.total > 500000000
![The amount conditions]()
Note
All employees will be paticipated in the approval process if they have the Approval: Officer access right and are linked to one corresponding user. If the approval step is required and no eligible user is found, the system will rasie a warning.
After completing all fields, press Save to store the approval request type.
Fields Enablement
To display the expectation field on the approval request, navigate to Fields Enablement tab. Here, you can configure which fields are appear in:
The request header,
The request lines.
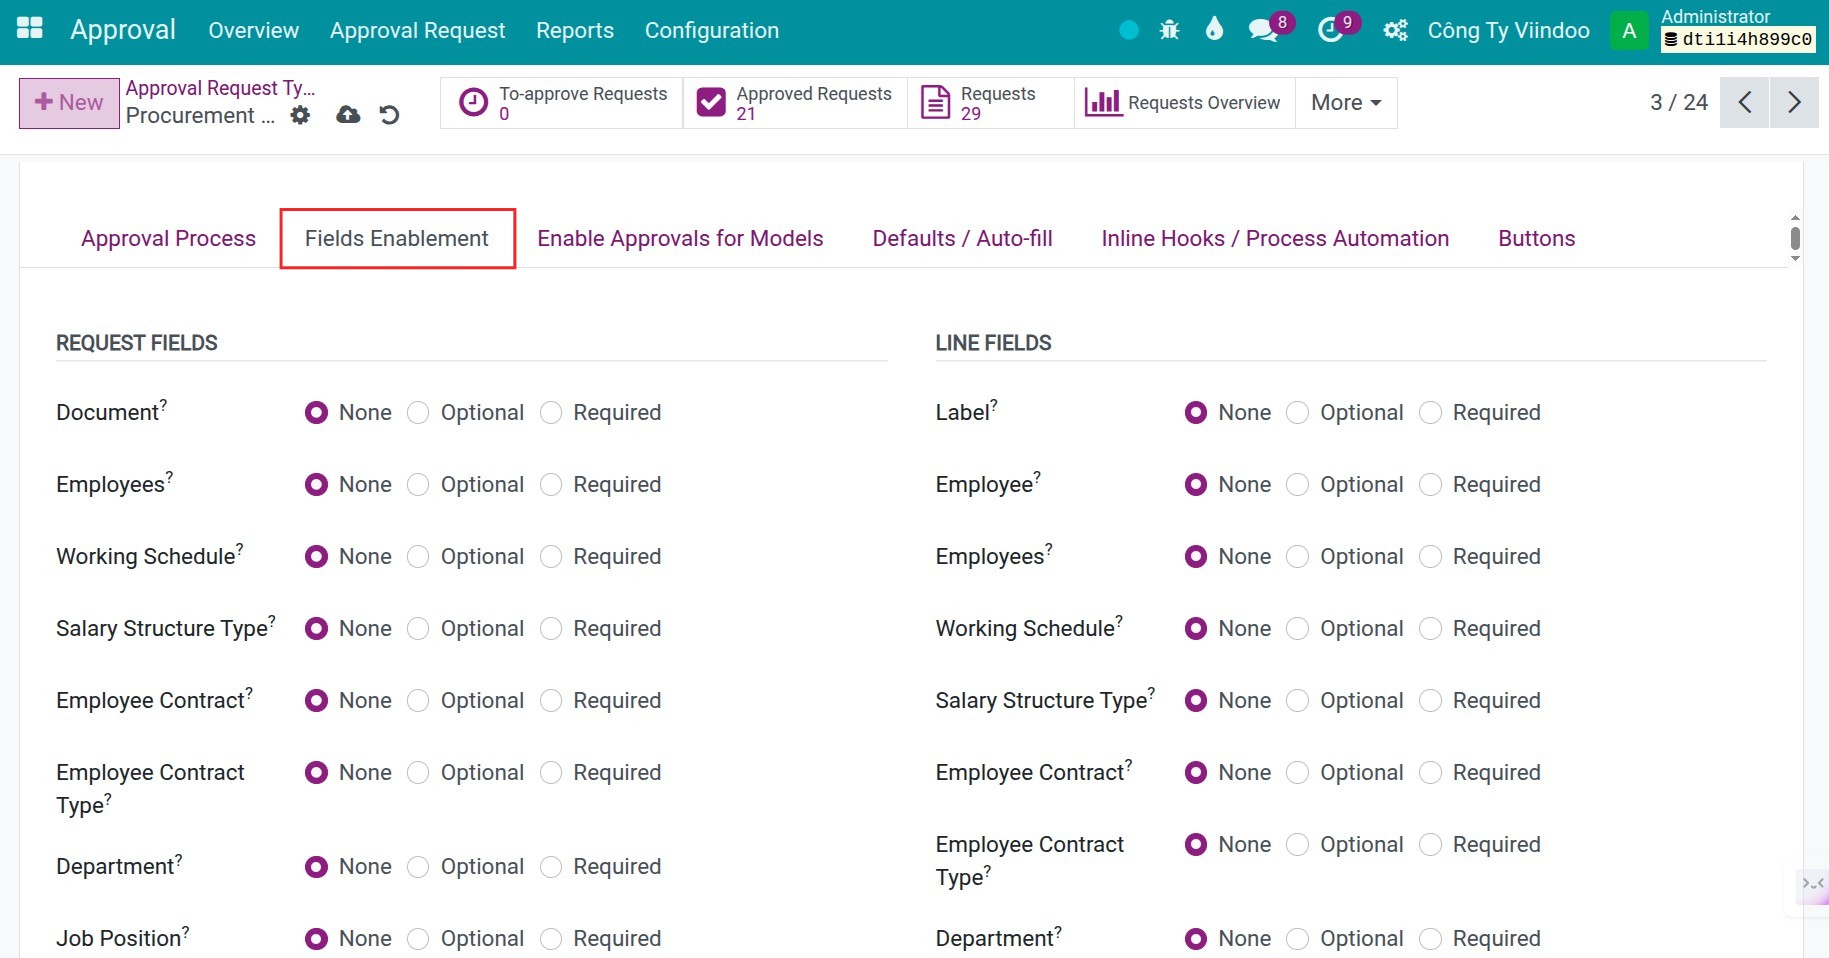
Each field has three display options:
None: This field is hidden from the request.
Optional: This field is displayed but not required to input data.
Required: This field is displayed and required to input data.
For the Optional and Required fields, you can also define the a custom display label.
Enable Approvals for Models
Use this section to enable the Get Approved button for specific business models (e.g., Sales Orders, Invoices, Projects). Once enabled, users can start approval requests directly from the model’s list or form view.
How it works
When a model is linked to this approval type, the Get Approved action appears in its action menu. Clicking it opens the Approval Request Wizard.
Each model can be added only once per approval type. If several approval types link to the same model, users can create separate approval requests for each type.
How to link a model
Go to the Enable Approvals for Models tab. In the Applies To field, select the model you want to link to the approval type.
Once the model is selected, additional configuration fields appear:
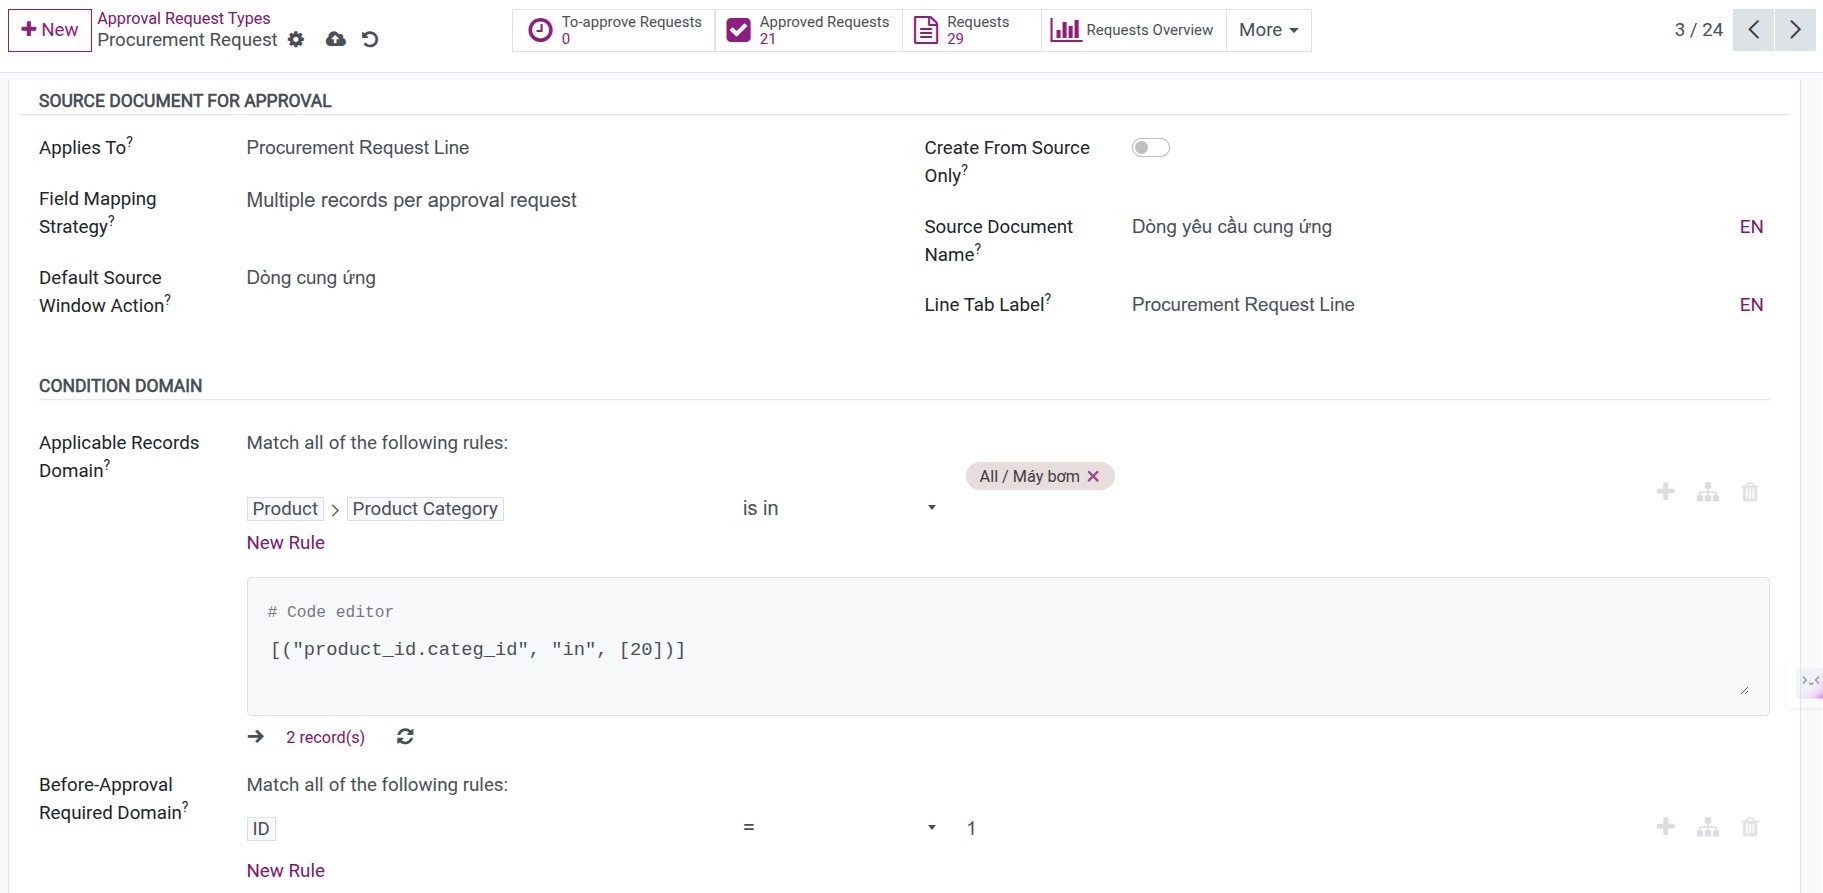
Field Mapping Strategy: Select one of two options below to determine how approval request are generated when users select records of this model in the Get Approved wizard.
One record per approval request: This option allow you to create a seperate approval request for each selected record. If the record has a line field mapped to approval request lines, each line is added as a separate item. Use this when each record needs its own approval process.
Multiple records per approval request: This option allow you to create one approval request for all selected records. Each record appears as a line in the request. Use this when approving many records at once.
Default Source Window Action: If set, the source selector will open this action instead of auto picking an existing main tree action.
Create From Source Only: When enabled, requests of this type can only be created from their source record via the Get Approved action. The kanban card will not show Create Request and will instead show a shortcut to source records that have no approval yet.
Source Document Name: The name of the source document to be display in user interfaces for better user experience.
Condition domain: Defines which requests require the approval process under this type.
Applicable Records Domain: Optional domain that restricts which records of this model can be approved by this type.
Before- Approval Required Domain: An optional domain that defines which records of this model must be approved by this type before performing sensitive actions. A record is considered approval required only if it matches this domain and also matches the domain in Applicable Records Domain (if any).
Field Mapping: Define how data from the model (e.g, Team Sales Target - team.sales.target) is copied to fields of the Approval Request (viin.approval.request).
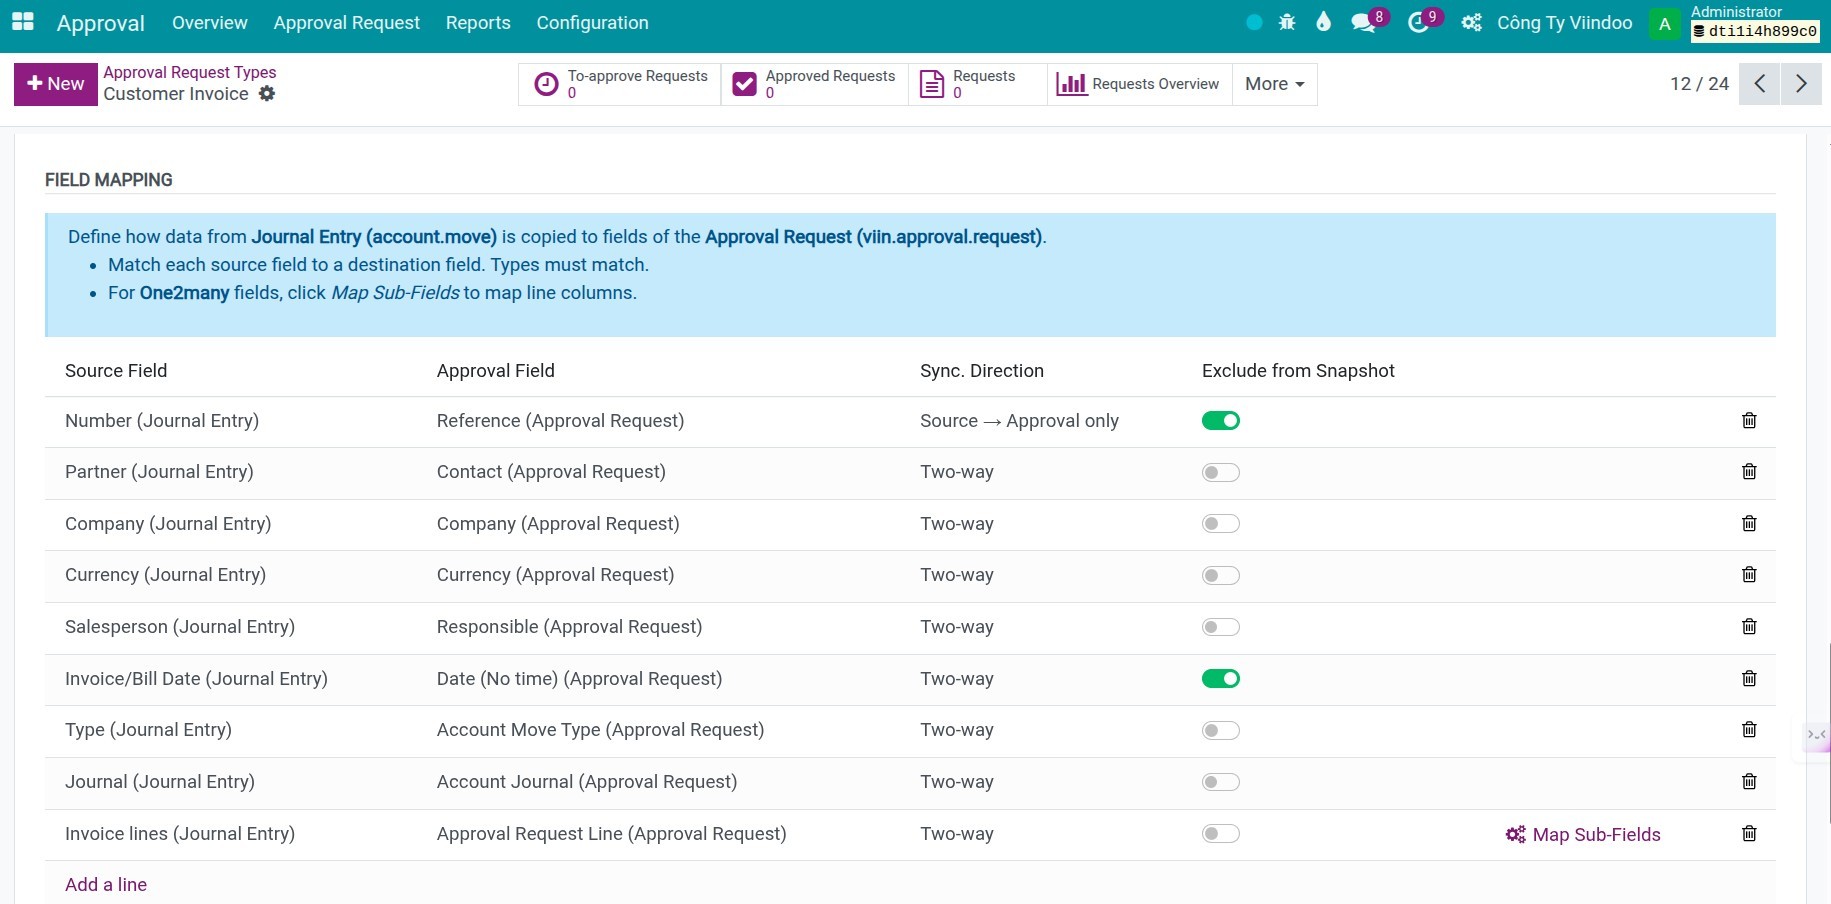
Source Field: The field on the selected source model that will be mapped with the corresponding field on the approval request.
Approval Field: The destination field on the approval request.
Sync. Direction: Defines how data is synchronized between the source field and the destination field.
Exclude from Snapshot: A Snapshot is the quick capture of this field’s value at a specific moment. If the value later changes, the system will warn the related users. you can disable snapshots for this field if you don’t want notifications when it changes.
Warning
You must map all the required fields if you want approval requests of this type can automatically inherit the data from the source documents.
Match each source field to a destination field. Types must match.
For One2many fields, click Map Sub-Fields to map line columns.
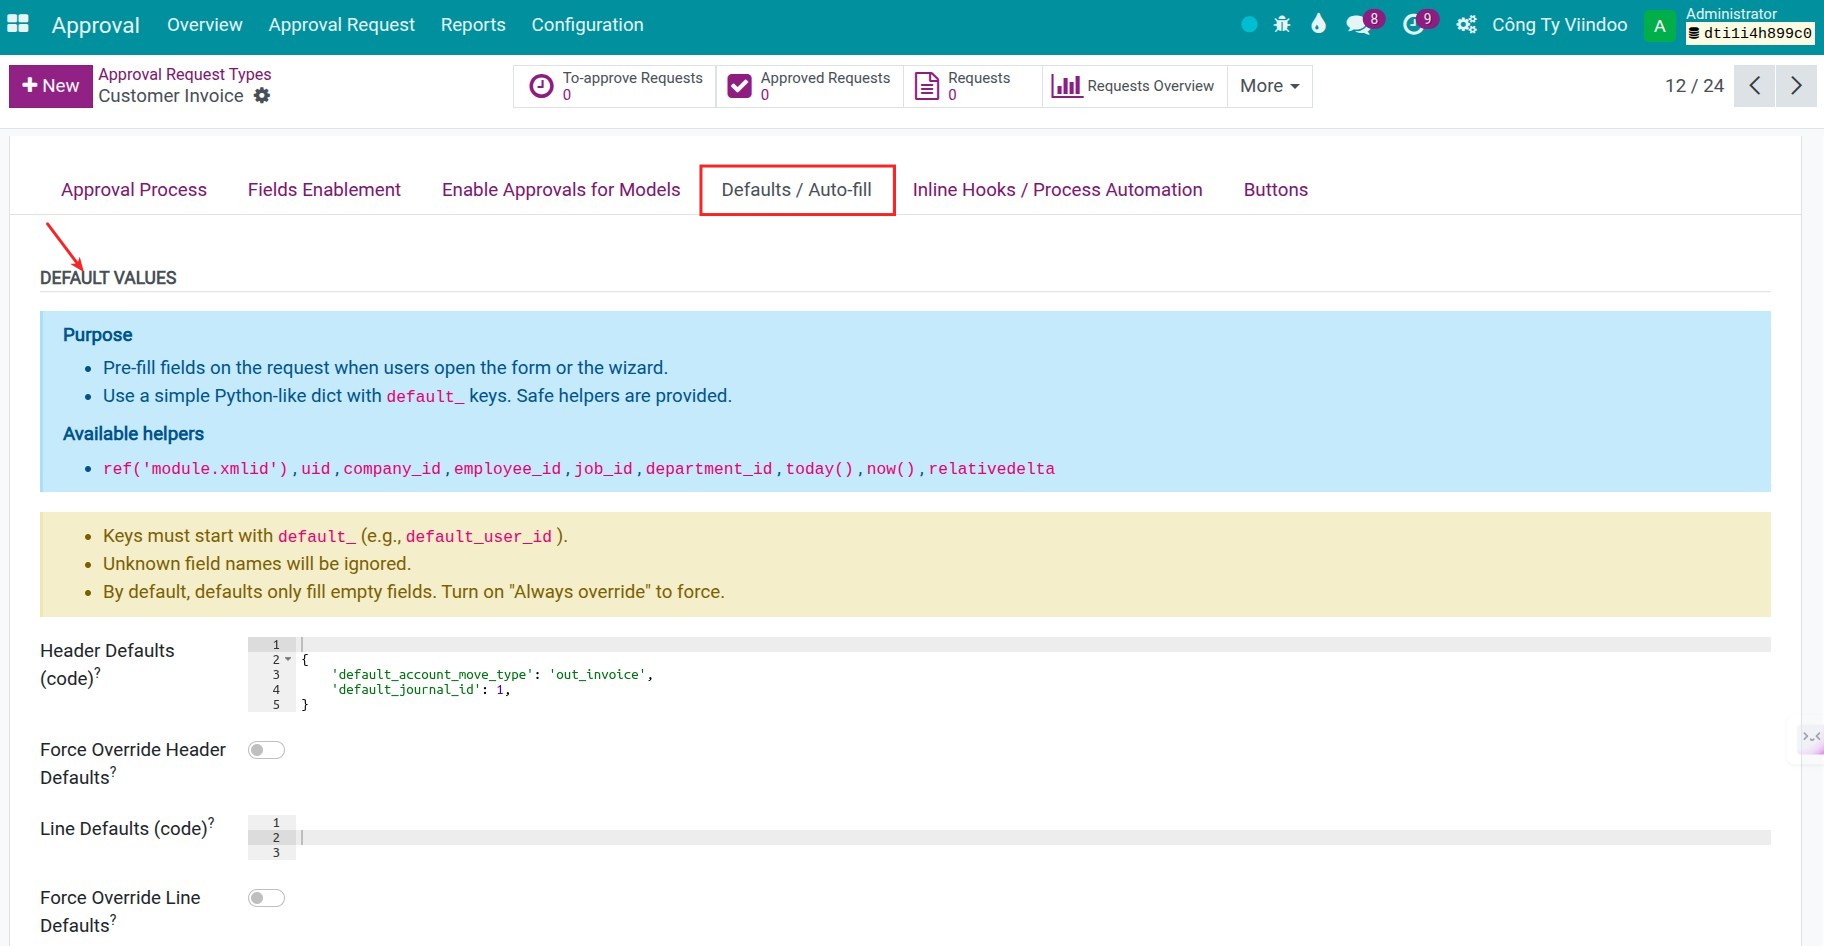
Defaults/Auto-fill
Pre-fill fields on the request when users open the form or the wizard. You can enter the Python code to configure the defaut data on the:
The request header
The request lines
Warning
Keys must start with default_ (e.g., default_user_id ).
Unknown field names will be ignored.
By default, defaults only fill empty fields. Turn on “Always override” to force.
You can also use the Onchange area to write Python code in purpose of automatically updating data on target fields when triggering fileds are changed.

Inline Hooks/Process Automation
This area lets you define Python hooks that run on the server before and after approval actions (confirm, approve, cancel, refuse, draft). Use these hooks to enforce custom business rules, extra validations, or side effects.
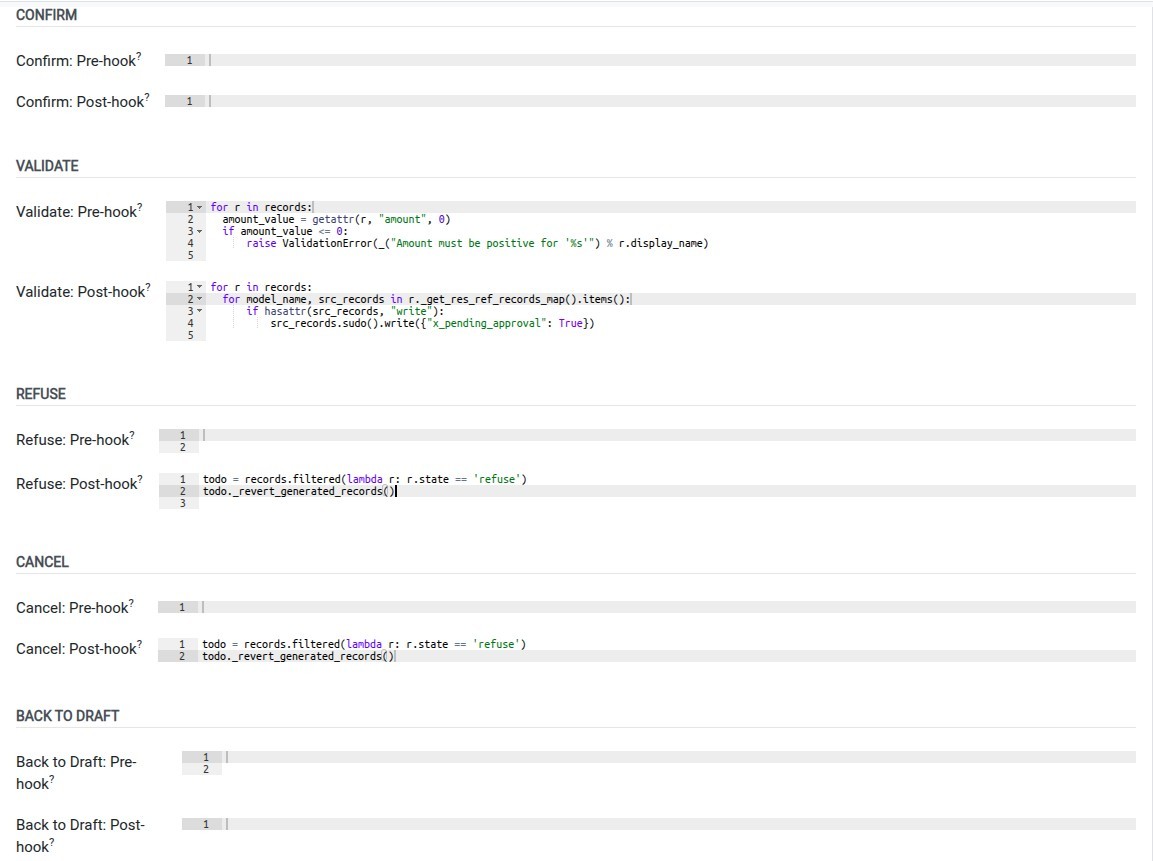
The default snippets in each field list the available variables and helpers (such as the current approval requests, mapped source records, dates, and utility functions). Start by adapting these examples instead of writing everything from scratch.
Apply inline hook for the each request status transition:
Pre-Confirm hook: Executed before the Confirm action.
Post-Confirm hook: Executed after the Confirm action.
Pre-Validate hook: Executed before the Validate action.
Post-Validate hook: Executed after the Validate action.
Pre-Refuse hook: Executed before the Refuse action.
Post-Refuse hook: Executed after the Refuse action.
Pre-Cancel hook: Executed before the Cancel action.
Post-Cancel hook: Executed after the Cancel action.
Pre-Back to Draft hook: Executed before the Back to Draft action.
Post-Back to Draft hook: Executed after the Back to Draft action.
Warning
Inline hooks run on the backend with your own access rights (or higher if you call sudo() ). Incorrect or unsafe code can break approval flows, corrupt or delete data, expose sensitive information, or severely impact system performance for all users.
Only experienced technical administrators should edit these hooks. By saving and enabling custom inline Python code, you and your organization accept full responsibility for its behavior and consequences. The module authors and Viindoo cannot be held liable for any data loss, outages, security breaches, or compliance issues caused by your custom code.
Always test and validate changes on a staging or backup system before applying them to production.
See also
Related articles
Optional modules