
Helpdesk
by Viindoo
| Lines of Code | 4157 |
| Technical name | viin_helpdesk |
| License | OPL-1 |
| Website | https://viindoo.com/intro/helpdesk |
| Read description for | v 13.0 v 14.0 v 16.0 v 17.0 v 18.0 |
| Required Apps | Discuss (mail) |
| Extensions | Helpdesk Timesheet Integration Website Helpdesk Integration Helpdesk & Odoo Version Helpdesk & Human Resources Integration Helpdesk & Sale Integrator Helpdesk Ticket Severity Helpdesk CRM Integration Helpdesk Livechat |
Demo video: Helpdesk
Description
- This module allows you to record and manage support tickets from customers and internal employees.
- Can be integrated with other apps in our all-in-one system, employees can create support tickets for customers or themselves during the working process. Thereby helping to speed up the ticket support process and increasing customer and employee experience.
Key Features
- Managing support tickets, including:
- Allows creating Support Teams, Ticket Types to categorize customers' tickets.
- Assign the ticket to each help desk team member.
- Send an email to the customer when the ticket stage change.
- Record the information exchange history on the Portal and Back-end view.
- Manage the time to resolve tickets.
- Manage customer rating.
- Overall tickets report.
- Integrate with other modules to record the tickets that occur during the working process and tickets from the customer.
- Is the base module and can be integrated with the Website module, Live chat, CRM, Sales, Project & Timesheet.
Warning: To avoid conflicts in the process of using this Helpdesk module, you must uninstall Odoo's Helpdesk if you are using it.
Supported Editions
- Community Edition
Installation
- Navigate to Apps.
- Search with keyword viin_helpdesk.
- Press Install.
How it works
Instruction video: Helpdesk
1. Configuration
Step 1: Set up Stages: This is the stages to process the support tickets. To set up, navigate to Helpdesk > Configuration > Stages.

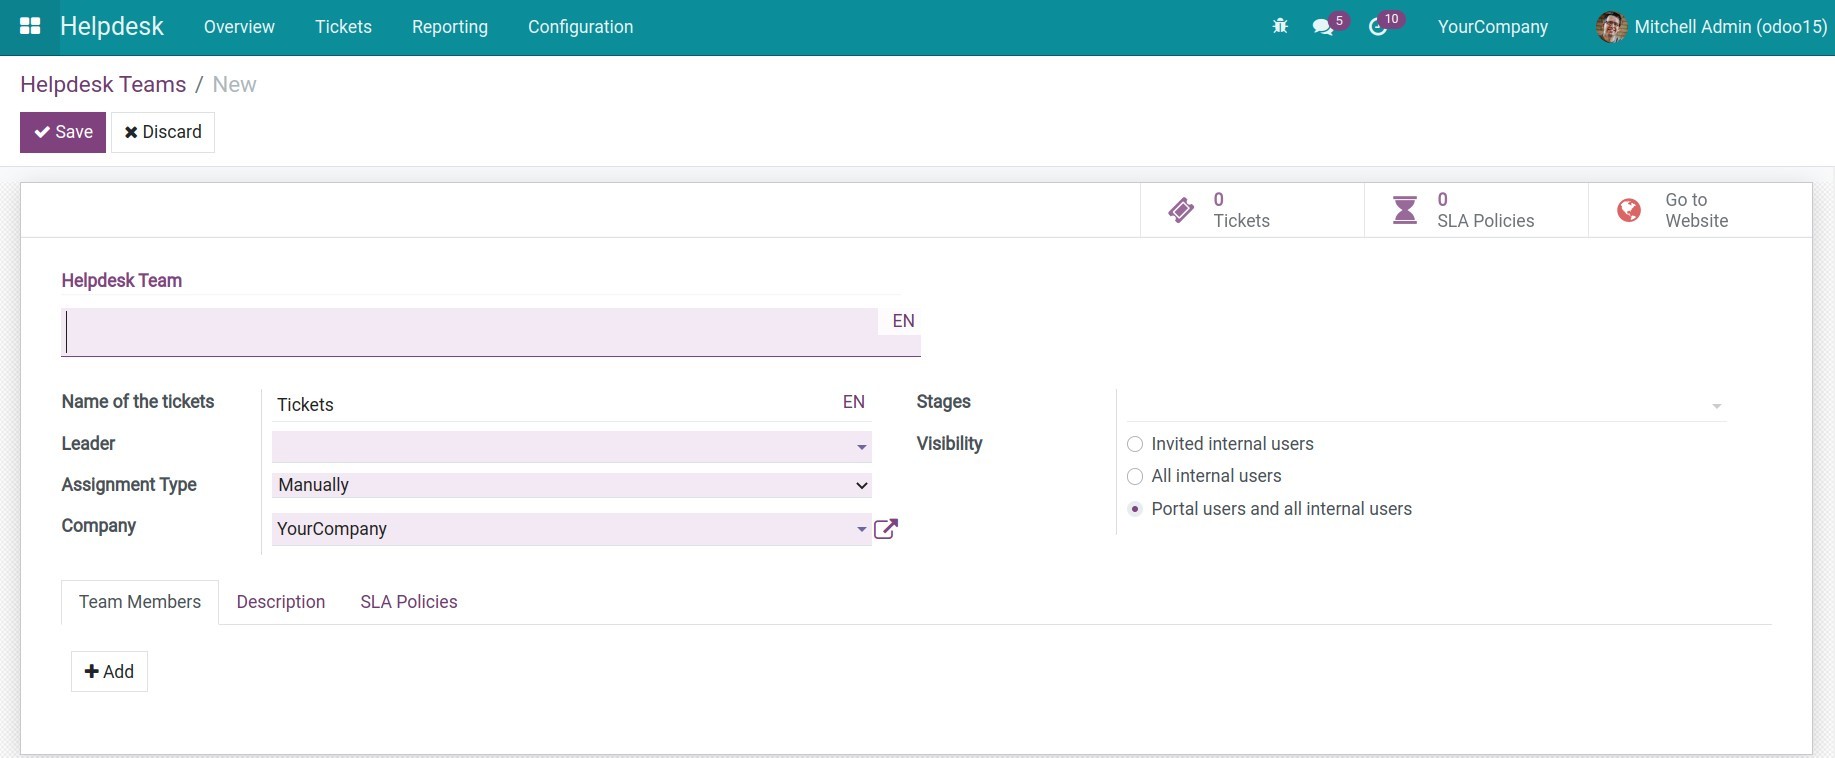
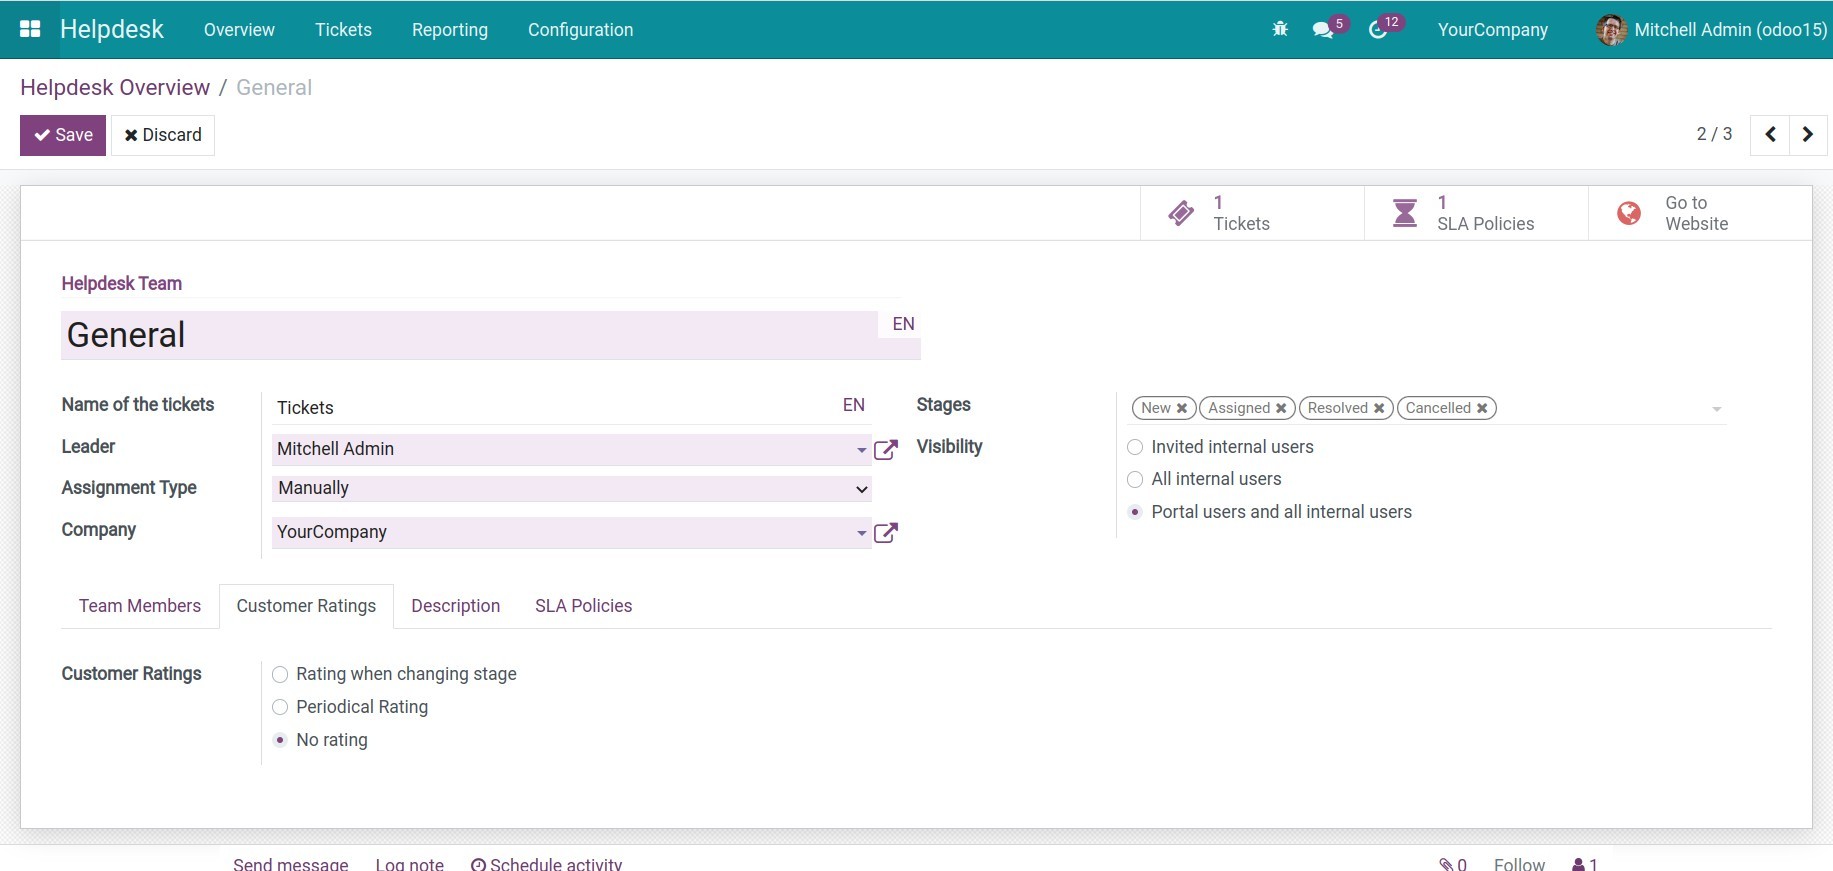
Step 2: Set up Helpdesk team: To set up helpdesk team, navigate to Helpdesk Team > Configuration > Helpdesk Teams.
Step 3: Set up Ticket types: Ticket types help desk team categorize the content of their tickets. To set up ticket types, navigate to Helpdesk > Configuration > Ticket Types.

Step 4: Set up Tags: Besides categorizing tickets by ticket types, users can also use tags to categorize the ticket, make it easier to filter, search the ticket. To set up tags, navigate to Helpdesk > Configuration > Tags.

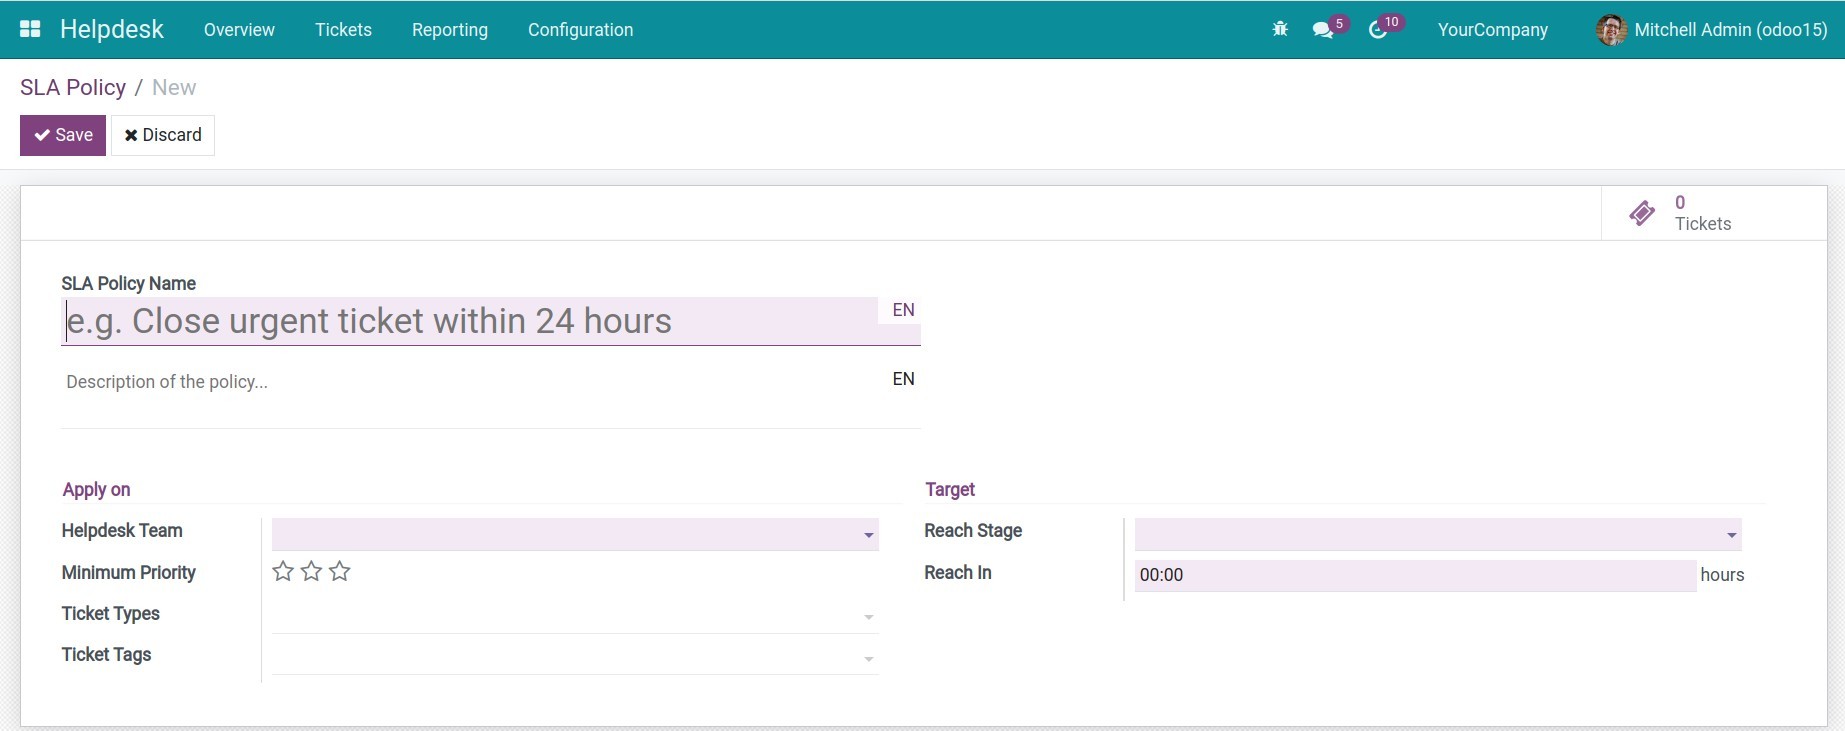
Step 5: Set up SLA policy: The SLA policy measure of the effectiveness of an employee's work when supporting a ticket. To set up, navigate to Helpdesk > Configuration > SLA policy.
2. Create a support ticket
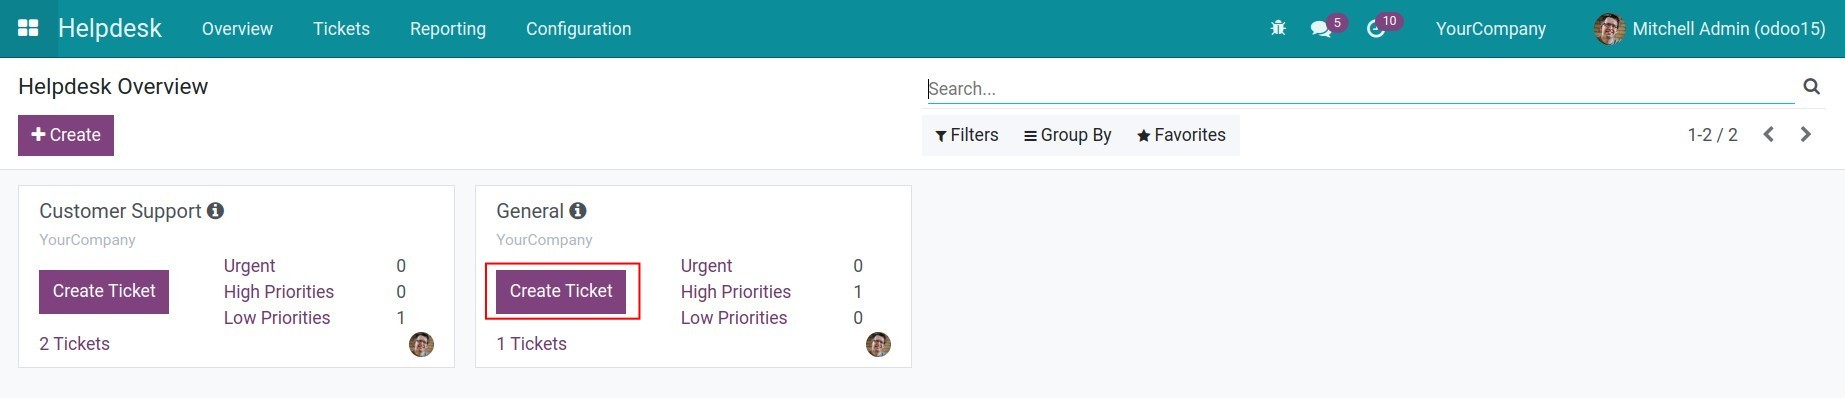
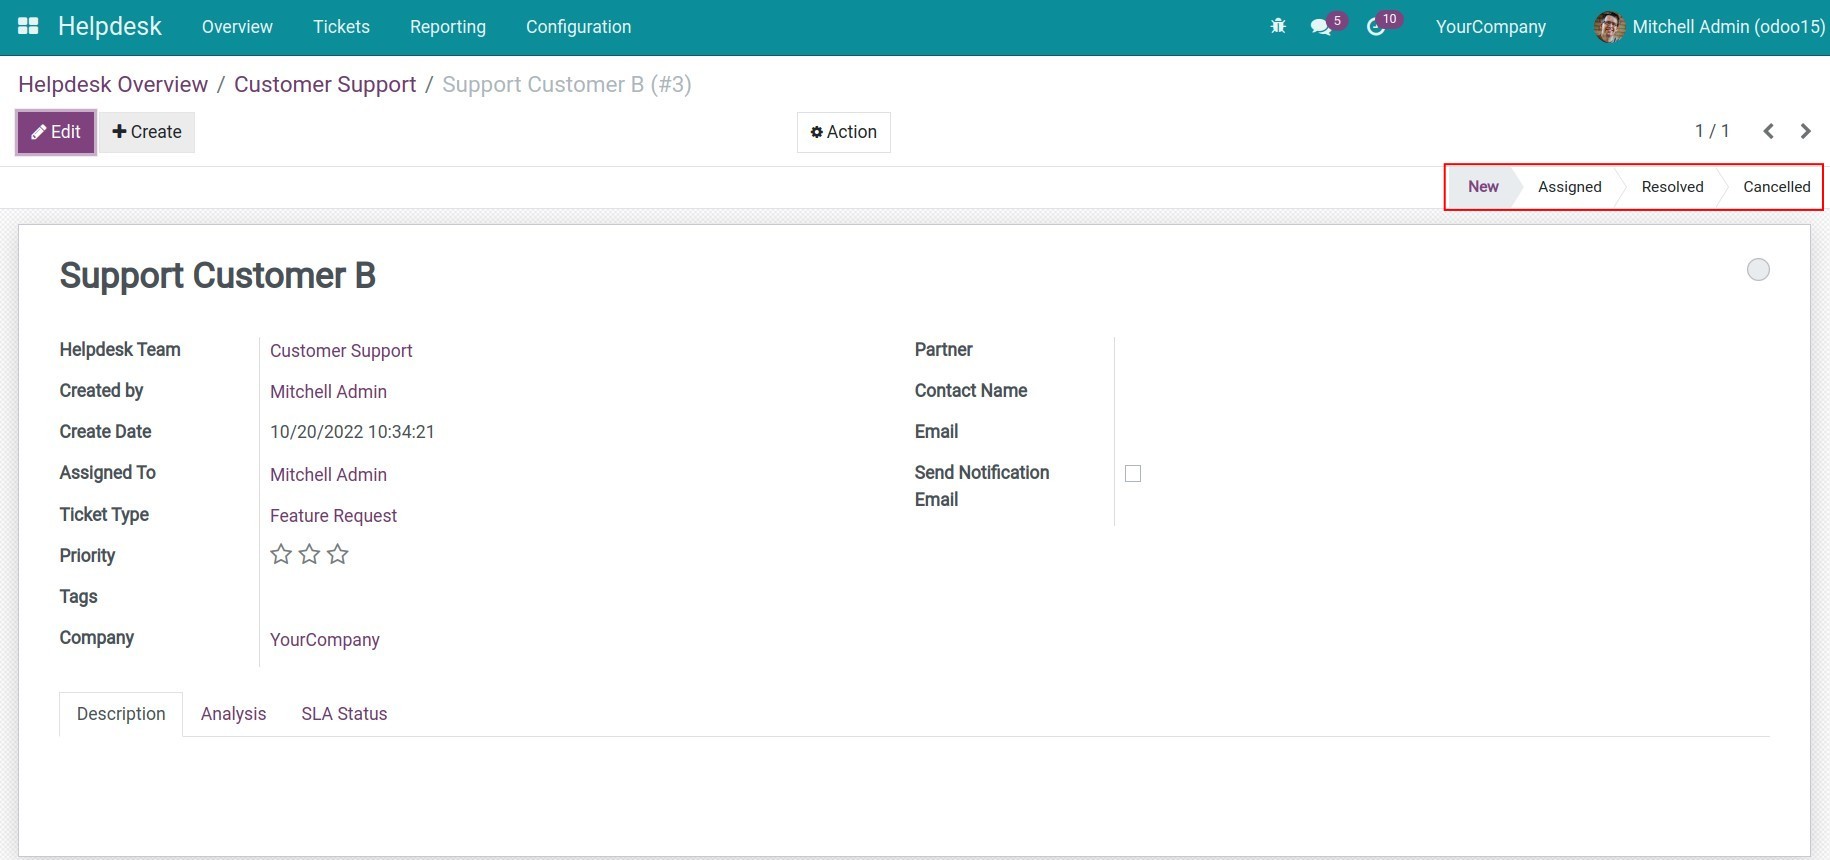
From the Helpdesk Overview, press Create to create a new ticket.
The following information will appear:
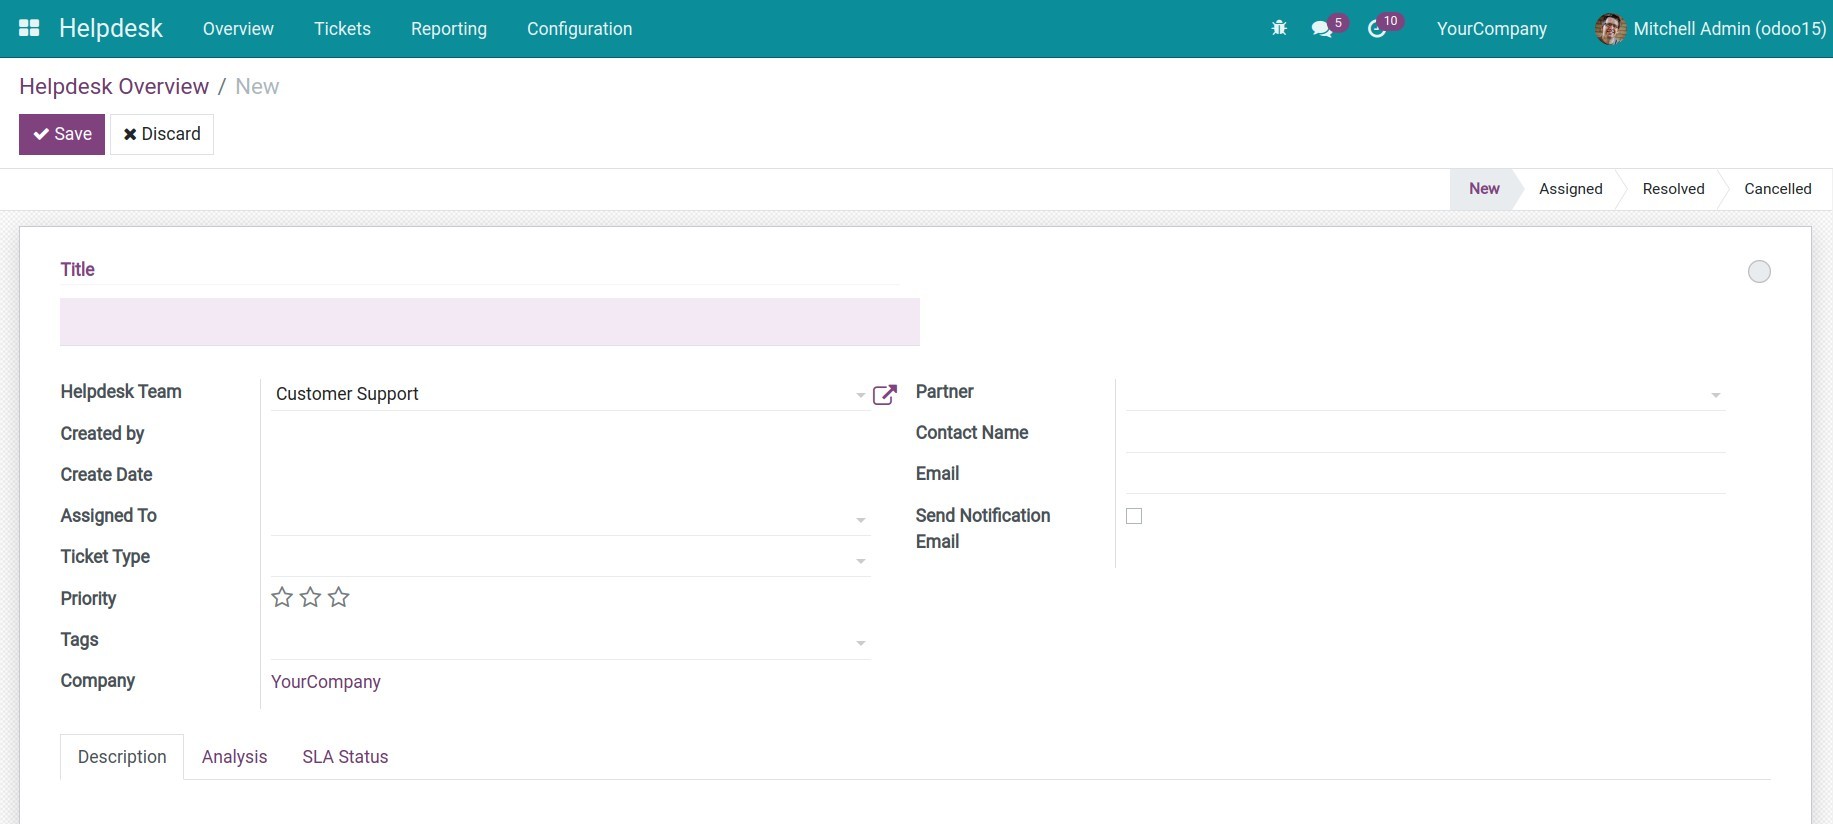
- Title: A short description of the issue, this is the same as an email title.
- Helpdesk Team: The group you selected will be set as default, but you can change to another group.
- Create by: The person who creates the ticket.
- Create Date: The date the ticket is created.
- Assigned To: The user in charge of this ticket.
- Ticket Type: Used to categorize the tickets based on specific subjects. For example, Questions, Issues, Feature Requests, etc.
- Priority: Priority levels of this ticket.
- Tags: Another way to identify the ticket, for searching.
- Company: The company in charge of this ticket (this field will appear if you use the multi-company feature).
- Partner: You can choose a partner if you want them to follow this ticket.
- Contact Name: The contact name of the partner. This field will disappear if you select a partner on the Partner field.
- Email: Partner’s email.
- Send Notification Email: If checked, the system will send an email every time the ticket changes to the stage where the email template was set up.
- The Description tab, Analysis tab, SLA Status tab: Detail of the ticket.
After filling in the information, press Save to save the ticket.
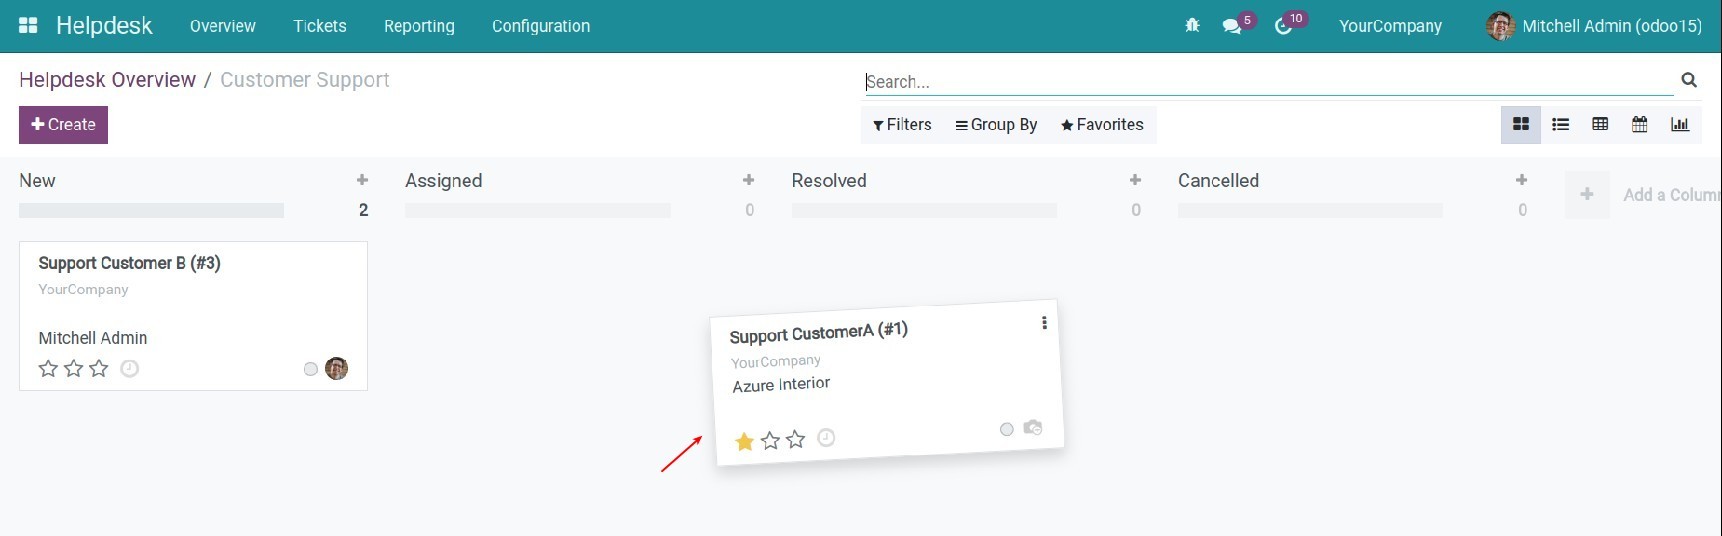
3. Change the ticket's stage
There are 2 ways to change the Ticket stage:
Option 1: Select the stage on the ticket view.
Option 2: Drag and drop on the Kanban view.
4. Customer rating
Step 1: Navigate to Helpdesk > Configuration > Settings, check on the Use Rating on Helpdesk field.
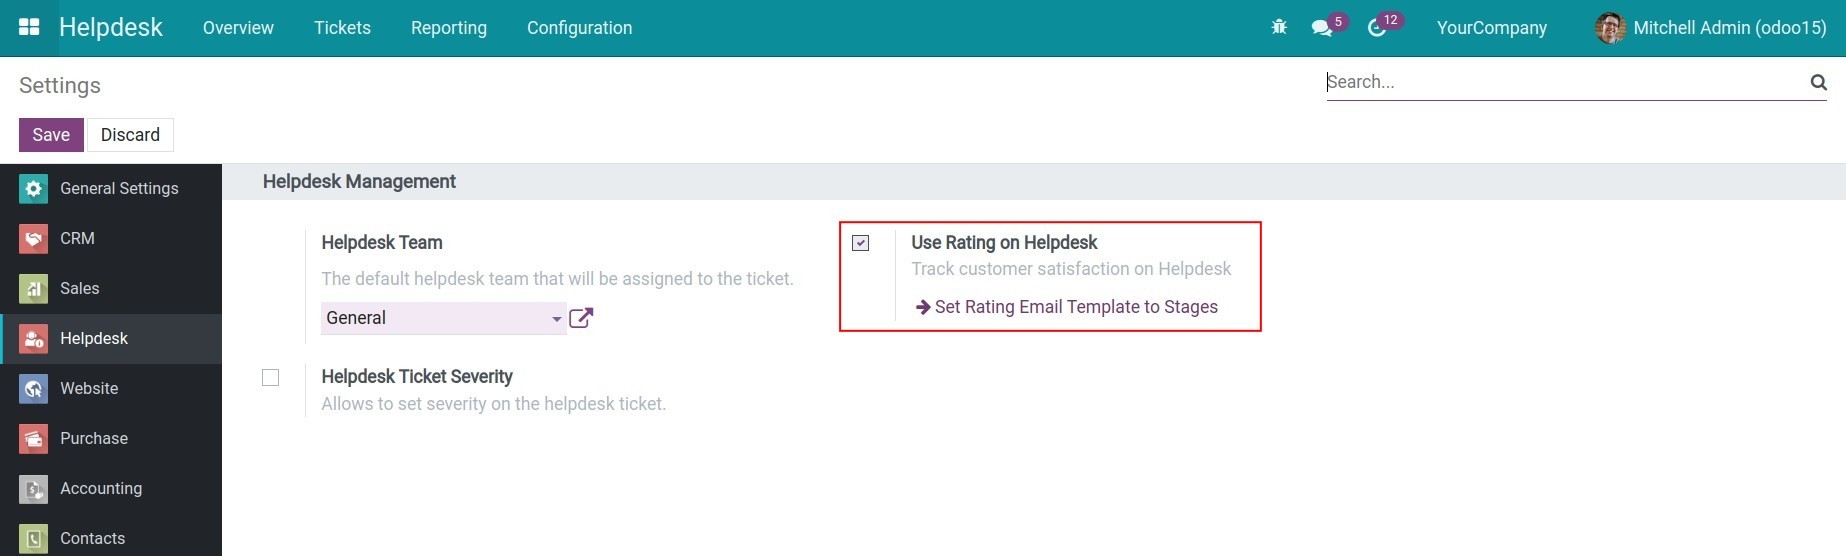
Step 2: After activating, the Customer Rating field will appear on the Ticket view.
5. View reports
Tickets Report: The report provides users with visual information about the Tickets in the charts and the Pivots view. To view the report, go to Reporting > Tickets Report.

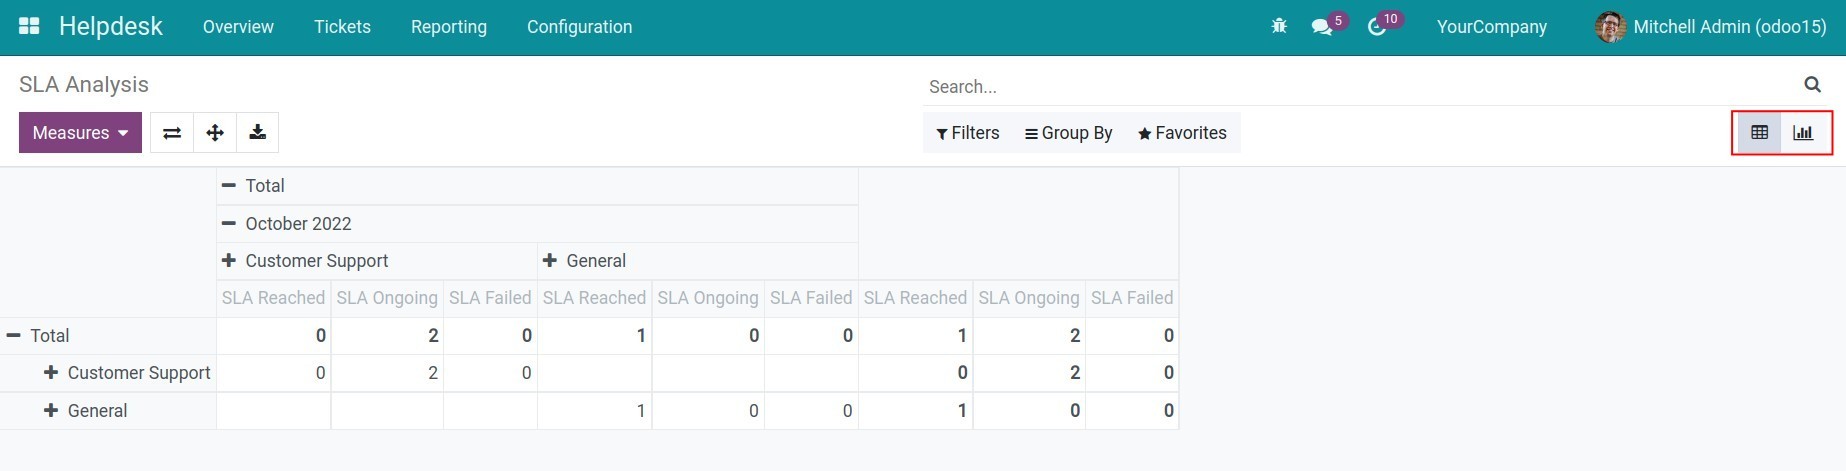
SLA Analysis: Allows users to see an overview of SLA policies by each measure such as support team, support request or company, etc. To view the report, go to Reporting > SLA Analysis.
You can refer to the Guidance for ticket management article.
This software and associated files (the "Software") may only be used (executed, modified, executed after modifications) if you have purchased a valid license from the authors, typically via Odoo Apps, or if you have received a written agreement from the authors of the Software (see the COPYRIGHT file).
You may develop Odoo modules that use the Software as a library (typically by depending on it, importing it and using its resources), but without copying any source code or material from the Software. You may distribute those modules under the license of your choice, provided that this license is compatible with the terms of the Odoo Proprietary License (For example: LGPL, MIT, or proprietary licenses similar to this one).
It is forbidden to publish, distribute, sublicense, or sell copies of the Software or modified copies of the Software.
The above copyright notice and this permission notice must be included in all copies or substantial portions of the Software.
THE SOFTWARE IS PROVIDED "AS IS", WITHOUT WARRANTY OF ANY KIND, EXPRESS OR IMPLIED, INCLUDING BUT NOT LIMITED TO THE WARRANTIES OF MERCHANTABILITY, FITNESS FOR A PARTICULAR PURPOSE AND NONINFRINGEMENT. IN NO EVENT SHALL THE AUTHORS OR COPYRIGHT HOLDERS BE LIABLE FOR ANY CLAIM, DAMAGES OR OTHER LIABILITY, WHETHER IN AN ACTION OF CONTRACT, TORT OR OTHERWISE, ARISING FROM, OUT OF OR IN CONNECTION WITH THE SOFTWARE OR THE USE OR OTHER DEALINGS IN THE SOFTWARE.