Schedule and Planning Vehicle Management
Schedule and Planning Vehicle Management is a critical function in organizational operations that ensures the efficient allocation of resources, time, and tasks to achieve business objectives. Viindoo Fleets focuses on optimizing workflows, reducing bottlenecks, and improving productivity by strategically planning and scheduling activities.
Requirements
This tutorial requires the installation of the following applications/modules:
Manage Routes
In fleet management, routes are defined as the paths that a vehicle needs to travel to complete the task of transporting goods or performing a specific service. Routes include the starting waypoint, the destination waypoint and the stops waypoints.
Starting waypoint: The location where the vehicle begins its journey (e.g., warehouse, bus station, or transaction point).
Destination waypoint: The location where the vehicle ends its journey or performs its task (e.g., delivery point, passenger pickup/drop-off point).
Stops waypoints: Intermediate locations where the vehicle needs to stop to deliver or receive goods or carry out a task.
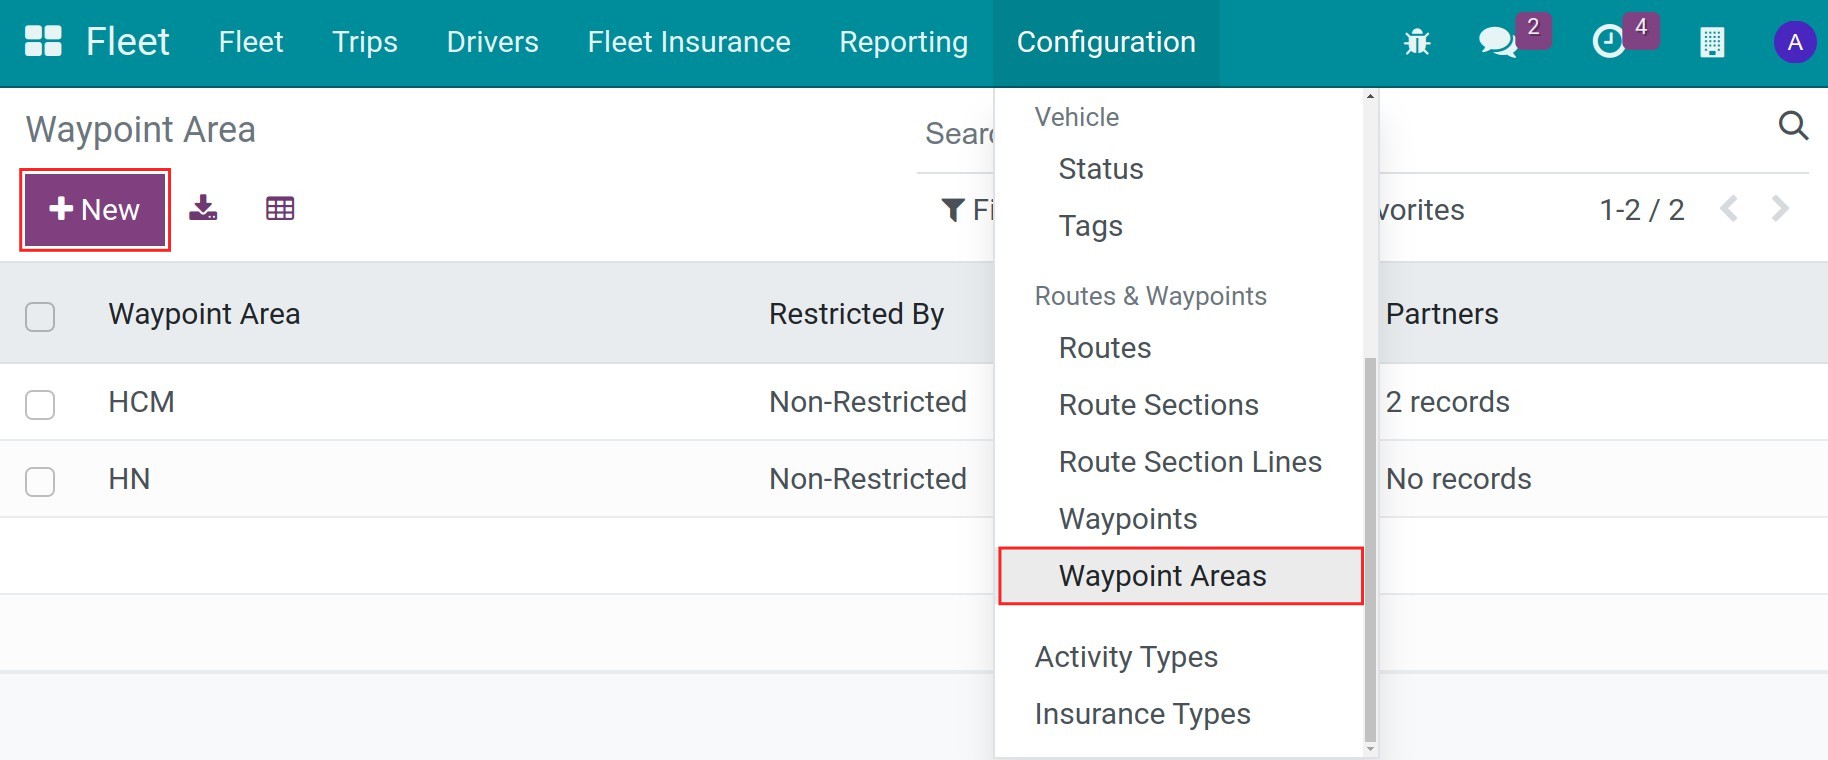
First, you can create the waypoint area to manage the waypoints. To create waypoint area, navigate to Fleet > Configuration > Waypoint Areas, press New:
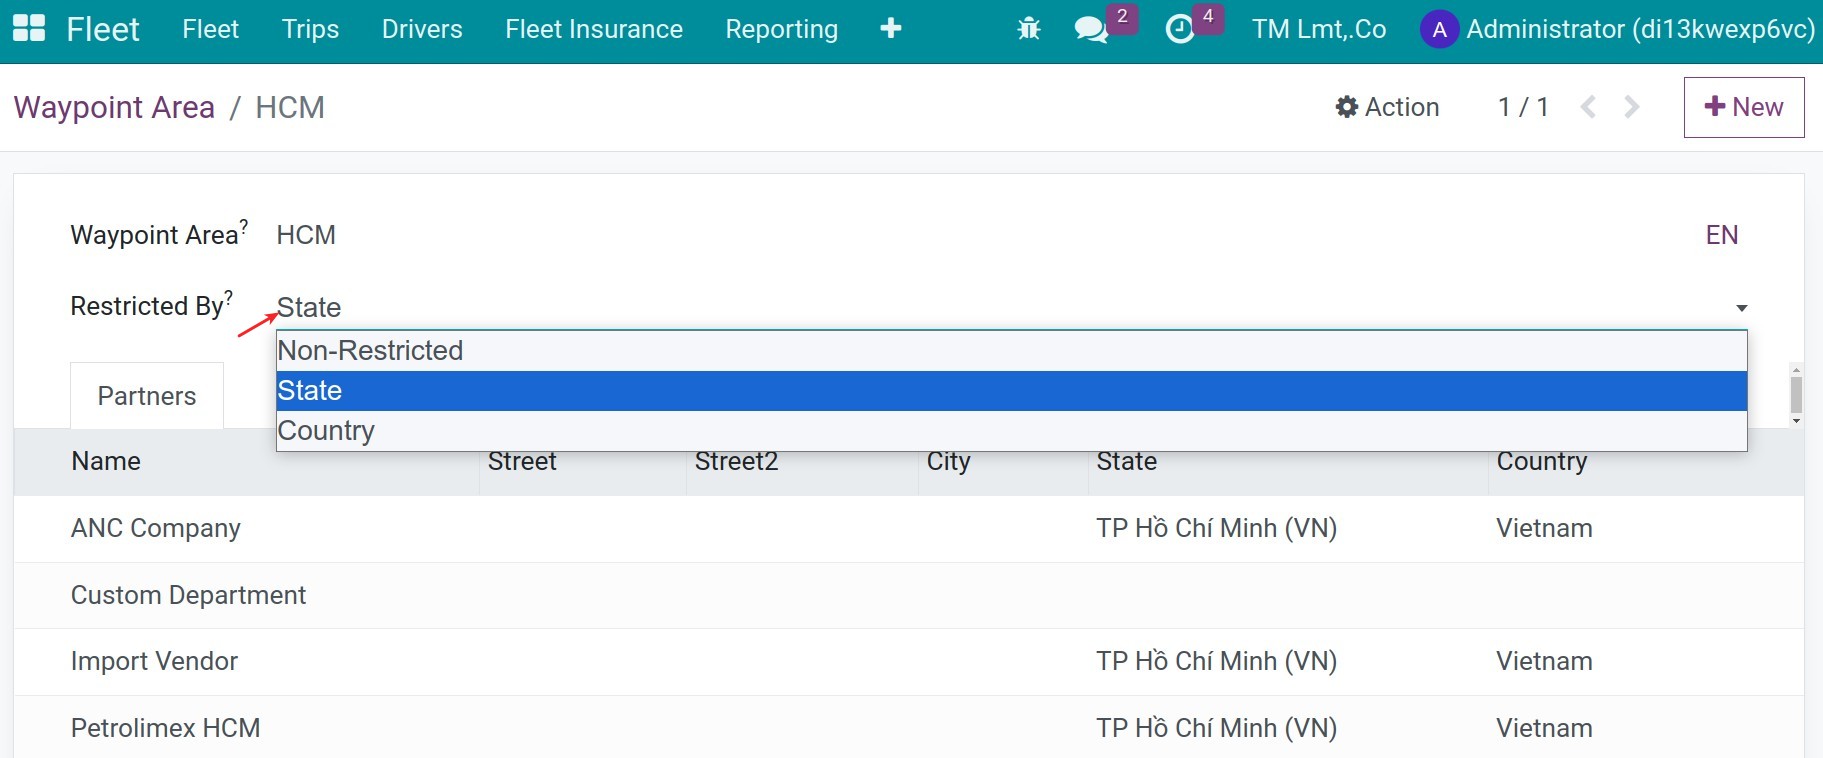
Waypoint Area: Name the waypoint areas.
Restricted By: Choose the option to make a rules to link waypoints to this waypoint area.
Non-Restricted: All the waypoints can link with the waypoint area.
State: Only the waypoints are in same state can link together with this waypoint area.
Country: Only the waypoints are in same country can link together with this waypoint area.
Patners: The list of contacts/waypoints of the waypoint area.
To create waypoints in Viindoo Fleet, navigate to Contacts app, press New to create a new contact. In Viindoo, waypoints are the contacts with full their addresses. On the contact, you can choose the respective Waypoint area.
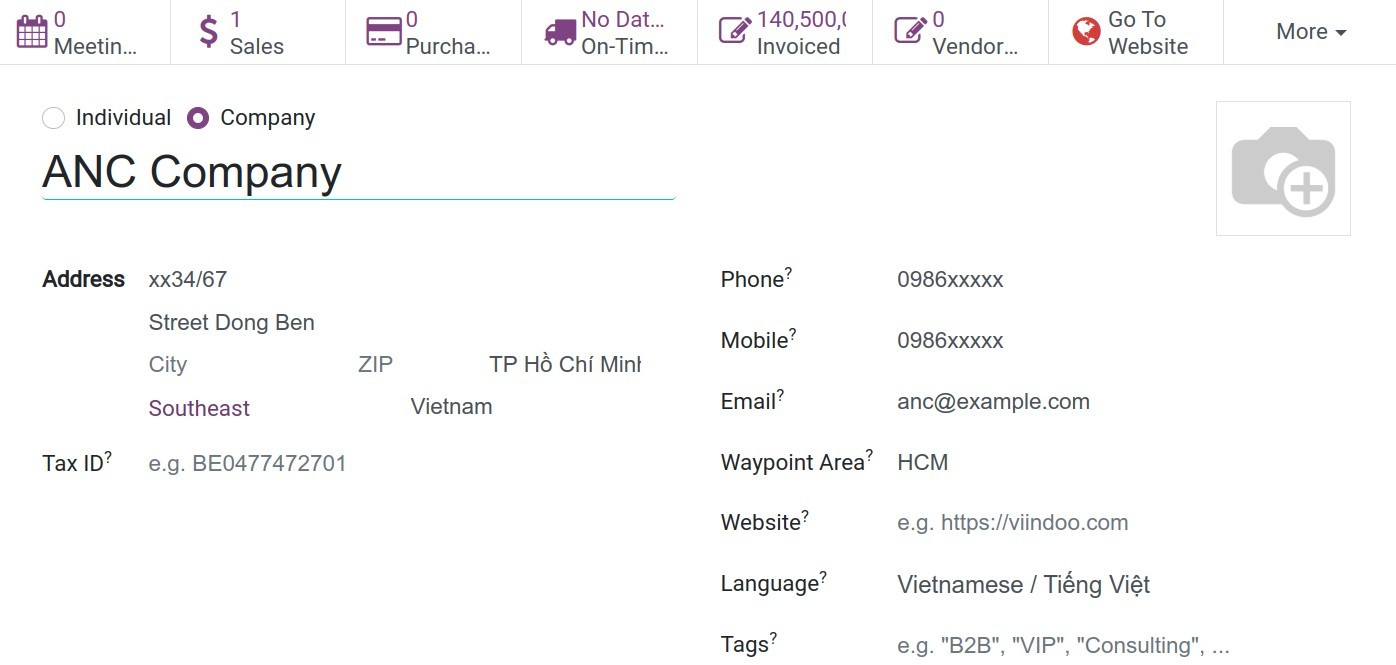
Move to Fleet Trips tab to state the default stop duration.
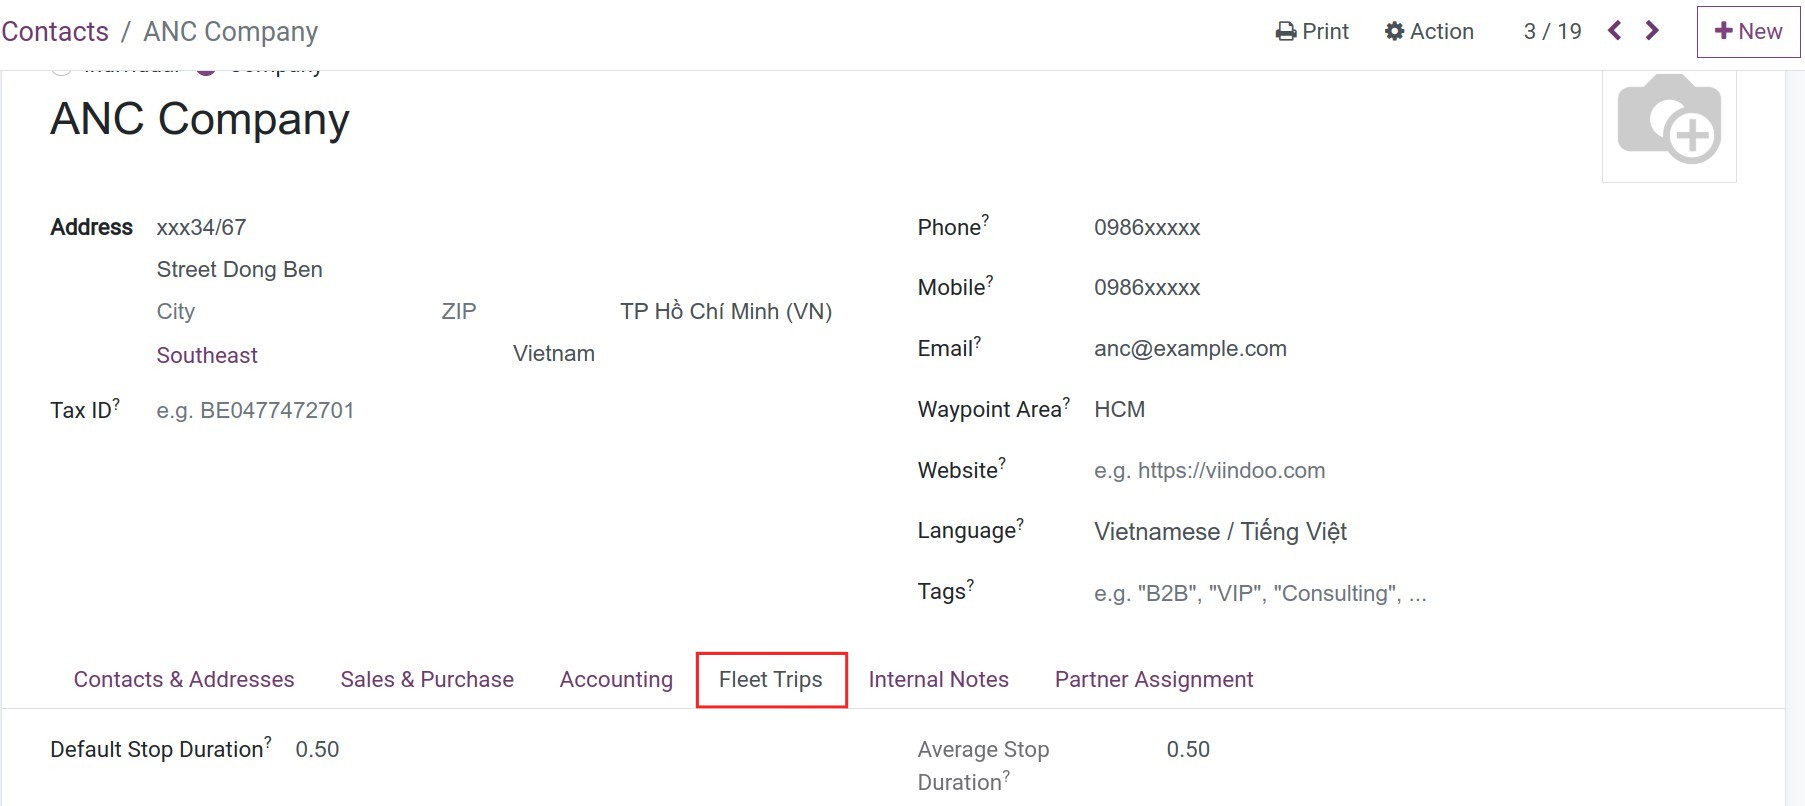
Default Stop Duration: The inputted number hours here are the planned stop time of the vehicle when it staying at this address.
Average Stop Duration: The average duration is computed using average method from the past trips’ stop time. In case no past trips, the Default Stop Duration will be used. In case the computed average duration is 30% less than the Default Stop Duration or 30% greater than the Default Stop Duration, the Default Stop Duration will be used instead of average method.
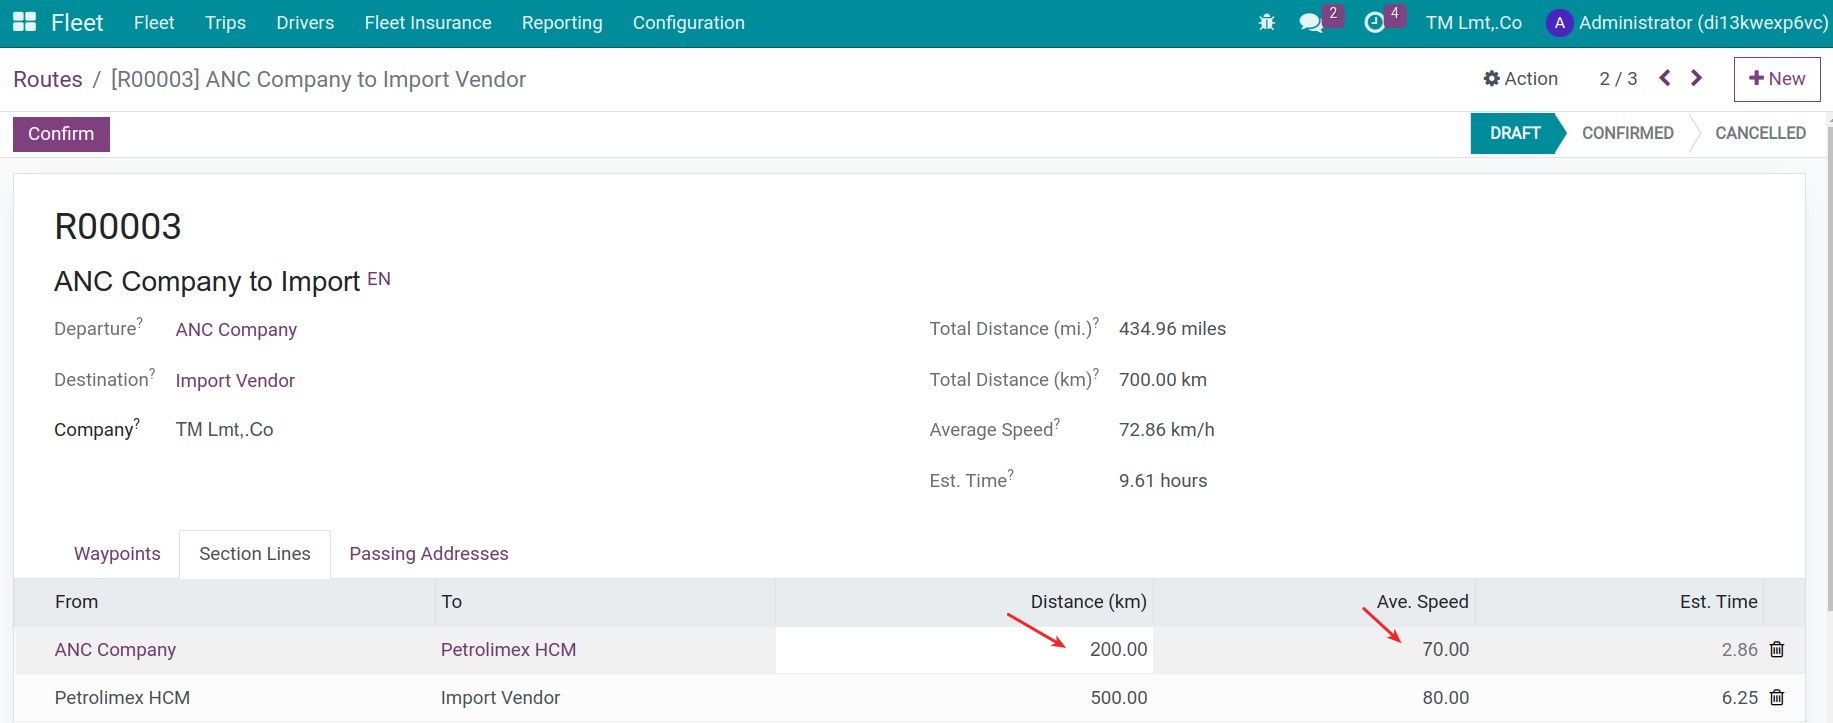
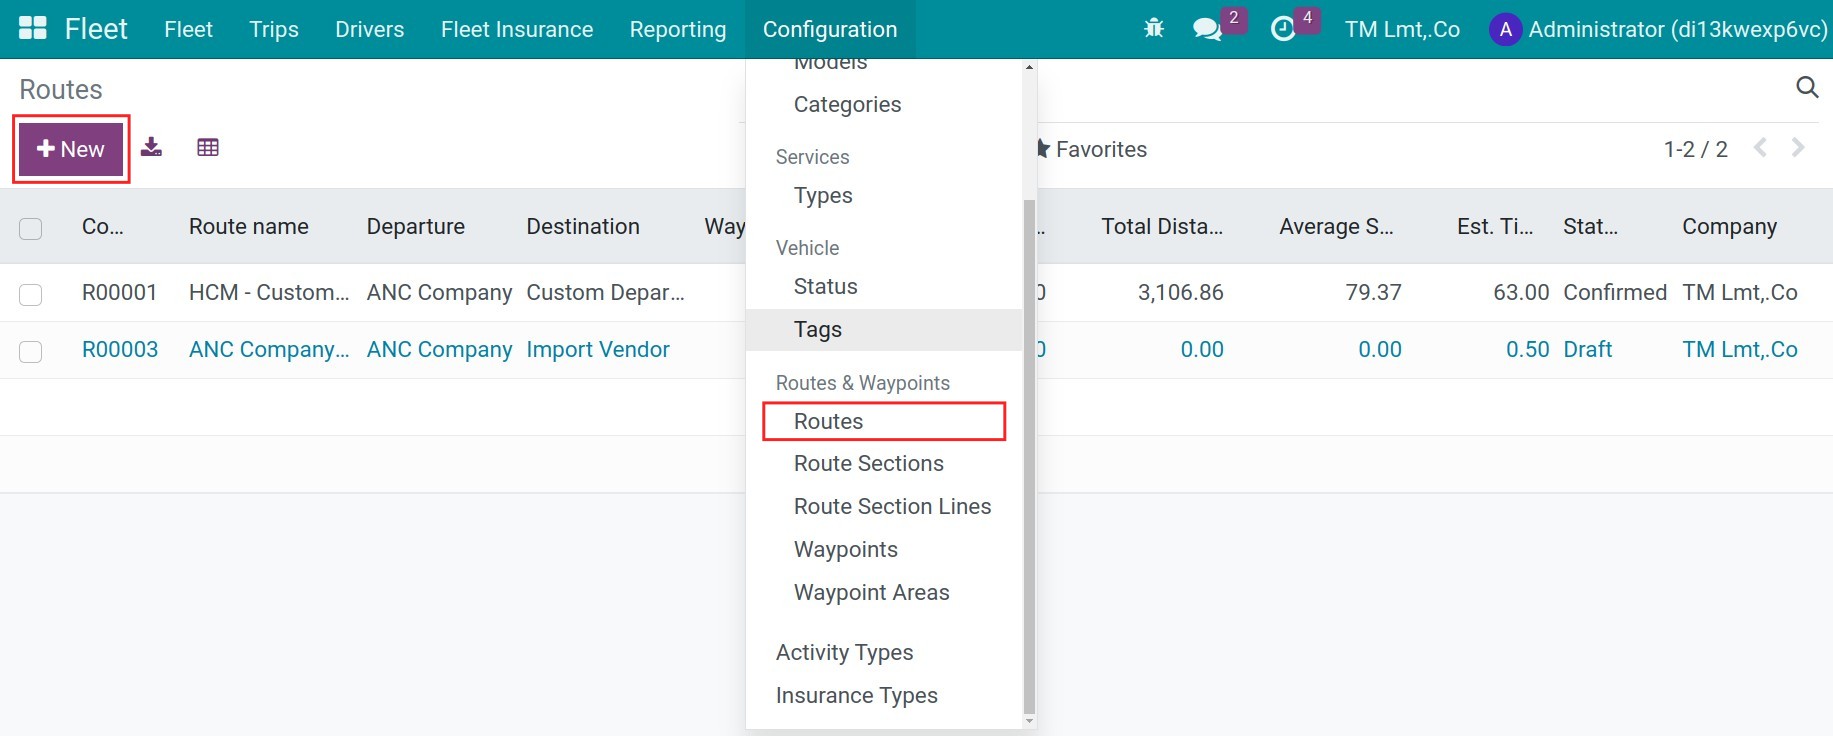
After creating the routes with the needed waypoints, you can see the list of waypoints by navigating Fleet > Configuration > Waypoints. To create Routes, navigate to Fleet > Configuration > Routes, press New:
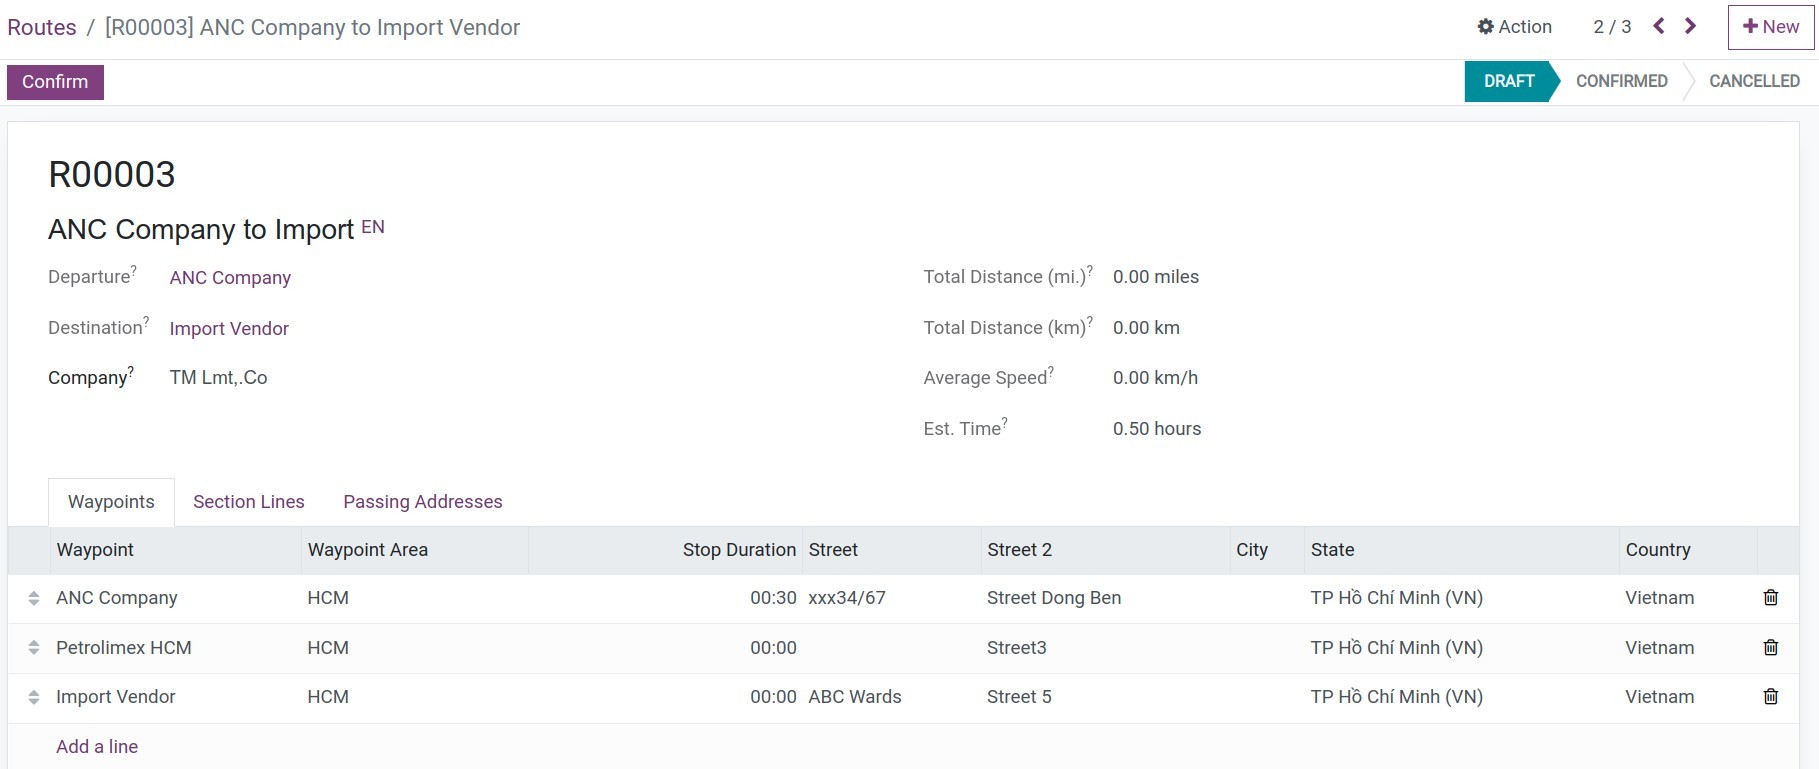
Departure: Based on the sequence of the waypoint, the first waypoint will be shown here.
Destination: Based on the sequence of the waypoint, the last waypoint will be shown here.
Total Distance (mi): Total Distance (in miles) of the route, which is automatically computed from the route section lines.
Total Distance (km): Total Distance (in kilometers) of the route, which is automatically computed from the route section lines.
Average Speed: The average speed (in kilometer/hour) of the route, which is computed based on the average speed on every section of the route.
Est. Time: The estimated time in hours spent to go through the route (without any stop consideration).
Waypoints: Press Add a line to choose the waypoint on the list. You need to list by sequence to the waypoints.
Section Lines tab: The route section lines of the routes. Here, you need to state the distance and average speed to each route line.
![Routes section lines]()
Distance (km): Input the distance between two waypoints.
Ave. Speed: Input the average speed when go through two waypoints.
Est. Time: Based on the distance and the speed, the system will calculate the estimate time.
Passing Addresses tab: There are the list of respective contacts.
After stating all the information, press Confirm.
Manage Trips
Planning Trips
To create new trips, navigate to Fleet > Trips > Planning, in the Calendar view, click to destination date and time, a New Event window will show up to fulfill the information of planning:
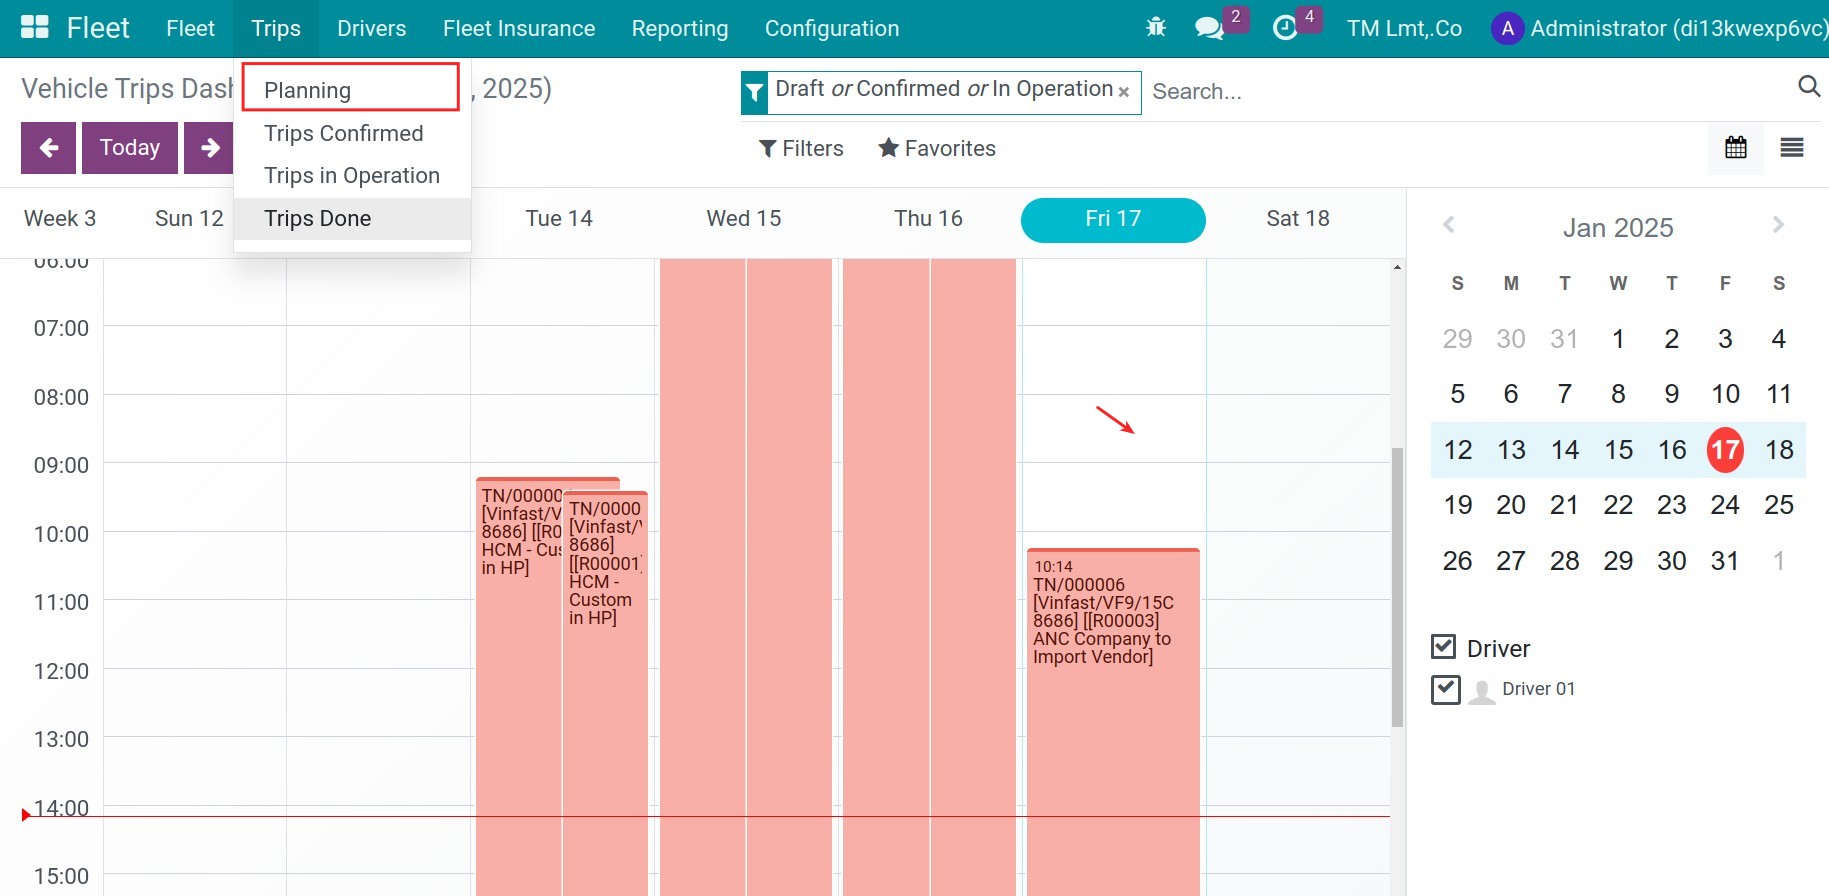
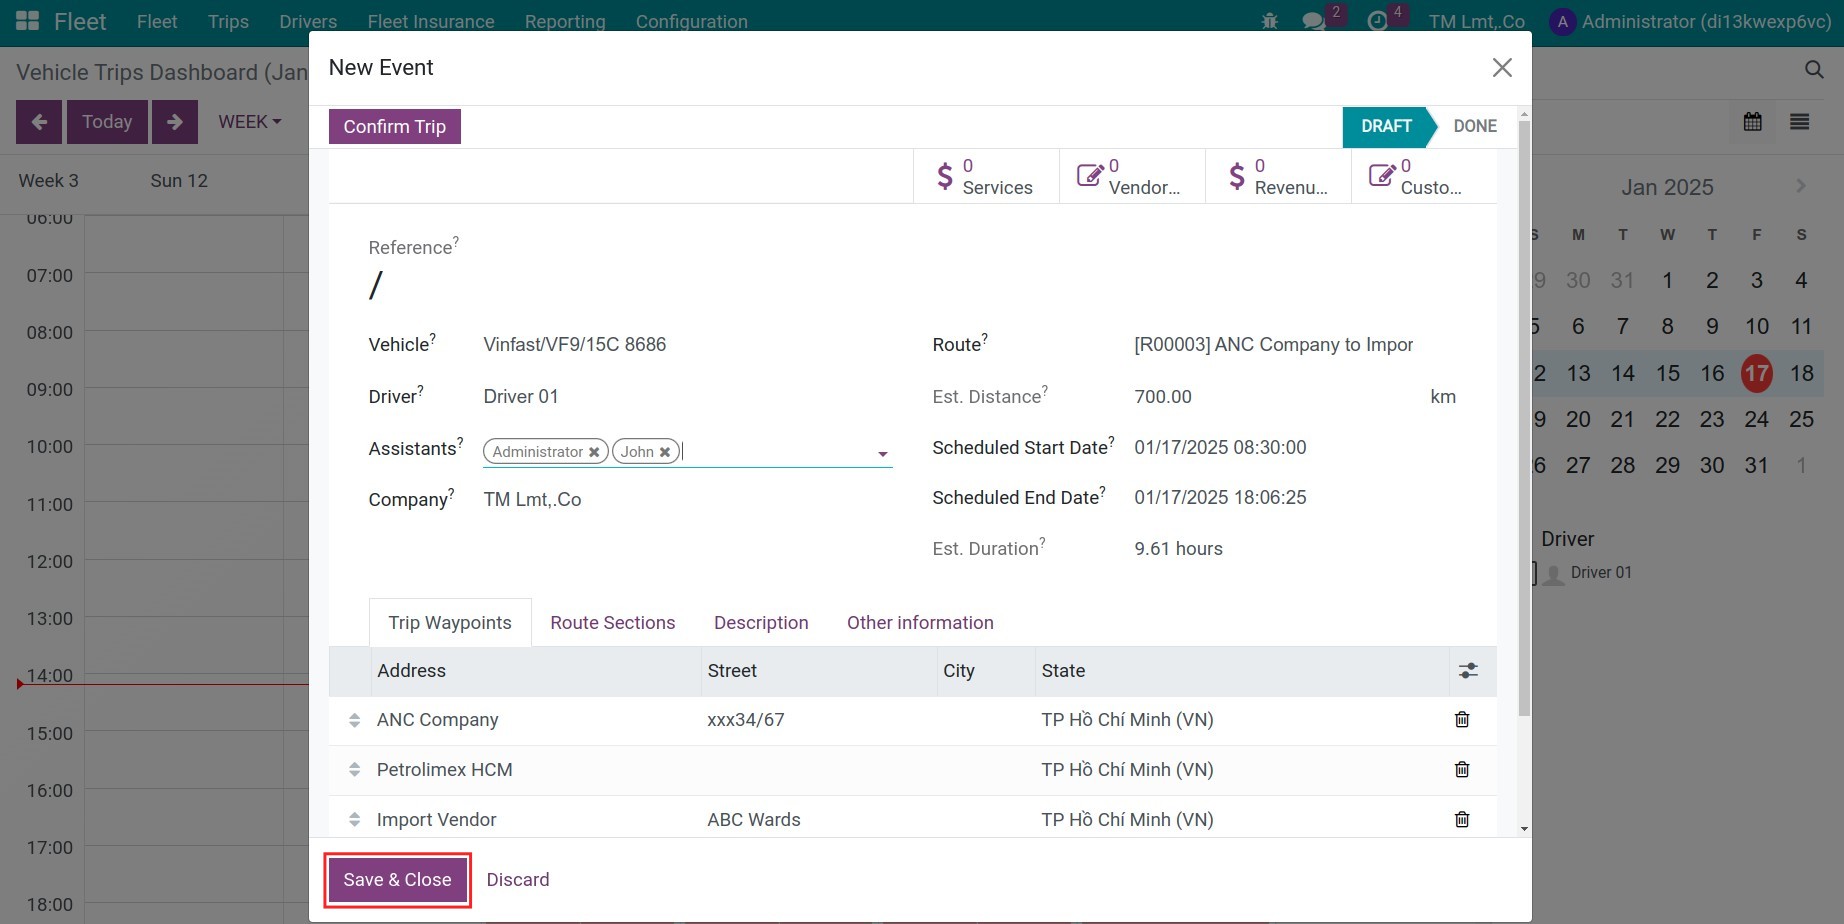
Vehicle: Choose the vehicle on the existing list.
Driver: The driver will be default from the above chosen vehicle.
Assistants: Choose the employee assist the trip.
Route: Choose the route that the vehicle will run.
Est. Distance: The distance will be from the route.
Schedule Start Date: Plan the starting date for the trip.
Schedule End Date: The estimate ending date of the trip. This date will be auto calculated from the starting date and the duration time.
Est. Duration: The information from the chosen route.
Trip Waypoints: The information from the chosen route.
After planning for the trip, press Save & Close, and then Confirm Trip.
Manage live trips
The planning trip will shown on the driver’s calendar. When starting the trip, the driver will press to the button Start Trip to record:
The real time starting.
The odometer value when starting the trips.

When occuring any service fee, the driver also can record them follow the article Revenue and Operational Cost Management. When finishing, press the button Done, then state:
The actual end date.
The Odometer Value when ending the trips.
And the Fuel Consumption.


See also
Related article
Optional module
